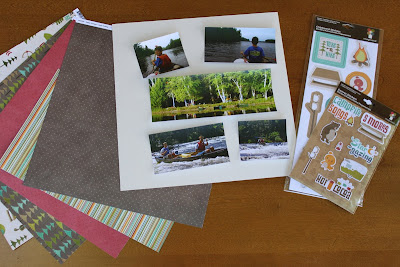
Supplies Used:
Imaginisce : Happy Camper Paper Pack and Chipboard Stickers
Bazzill Basics : 12”x12” Cardstock - French Vanilla
Photos
Instructions:
Step 1: Select Photos and Paper
Selecting photos is often the hardest part during the scrapbooking process. To make it easier, choose pictures with a similar theme such as “canoeing,” “around the campfire,” “hiking,” etc… Alternatively, selecting the right paper is much easier. The Imaginisce ‘Happy Camper’ paper is perfect for any camping layout and offers coordinating embellishments!

Step 2: Enlarge, Crop, and Mat Photos
The 5 picture sizes for this page includes: two 2 ¾” x 3 ¼”, two 2 ¾” x 5” and one 3 ¼” x 8 ½”.
Mat the photos with Bazzill cardstock to add a focal point and create balance.

Step 3: Design Background
Use the Imaginisce paper to create a simple background with a canoe strip and a 3” strip of lined paper at the bottom and a 1 ½” strip of lined paper at the top of a 12x12 sheet of brown cardstock.

Step 4: Add Journaling
Over time, photos might lose their meaning without a brief explanation, so be sure to either type or hand-write a short journal entry.

Step 5: Adhere and Embellish
Adhere the photos, text, and any embellishments to the background page. A simple chipboard sticker can do just the trick to complete the page!

Happy crafting!


Love this paper. The canoes on the bottom are great. Thanks for sharing this layout.
ReplyDelete