
Who doesn't love a wedding? The happy smiling couple and all their friends and family around to share in their joy. Is there anything better than seeing two young people starting their lives together?
Lindsey has been working hard in our Design Room coming up with some simply adorable wedding ideas and we'd like to show off her talent (and we've included the instructions just to be extra nice :) ).
For instance, we have this darling Bride Box.

Lindsey used the Tim Holtz Shabby Vintage Paper Stack and the Sizzix Bigz Pro Die : Box, Match by E.L. Smith to create this adorable box.

Coming soon to OMC is this super versatile Chipboad Scallop Circle from Technique Tuesday!

Lindsey used the D'vine Swirls Cuttlebug Embossing Folder to create this fun texture on the box. We think it gives it that extra bit of elegant flair every wedding needs!
Supplies:
My Mind’s Eye: Lush Blue Floral Sheet
Cuttlebug A2 Embossing Folder: D’vine Swirl
Tim Holtz Distress Inks: Pumice Stone
Tsukineko: Fantastix Pen Tool
Technique Tuesday: Chipboard Scallop Circle (Coming Soon to OMC!)
3” wide Aqua Blue Tulle (any brand)
Tattered Angels Glimmer Mist:
- Green Tea
- Blue Skies
Basic Grey: Nook and Pantry Alphabet Stickers
Sizzix Bigz Pro Die: Box, Match by E.L. Smith
Cuttlebug Machine
Technique Tip: When using multiple Tattered Angels Glimmer Mists to create your desired color combination, spray the first color and dab the extra off with a paper towel. Next, spray your second color and dab the extra off. Repeat until you get you desired color. (Make sure you swirl your Glimmer Mist bottles instead of shake. This will prevent clogging and globs of mist on your projects.)
INSTRUCTIONS
Step 1: Take you My Mind’s Eye Lush paper and cut it out with Sizzix Bigz Pro Die. Next, by following the directions that come with the die, assemble the box.
Step 2: Using your Fantastix tool and your Pumice Stone Distress Ink, dab a little of the ink onto the swab end of the tool. Next, ink parts of the D’vine Swirl Embossing Folder (don’t worry the ink will come off). Finally, fold the box flat so that it will fit in your embossing folder. Emboss the box by putting the embossing folder through your Cuttlebug machine.
Step 3: Take the Technique Tuesday Chipboard and mist it using the Tattered Angels Glimmer Mists (see technique tip). Let your box dry for about 5 minutes.
Step 4: Once the chipboard is dry, take your Nook and Panty Alphabet Stickers and spell out “bride”.
Step 5: With your blue tulle (for this project, Lindsey used Bazzill Basics 3” Tulle), cut a piece 11 inches long and tightly tie it around the top section of the box. Place the chipboard under the knot of the tulle. Your knot should be tight enough that it will hold the chipboard in place.
Up next we have a cute card for the happy couple! Mr. and Mrs. officially, this card is perfect to say congrats!

Isn't the Ampersand Bling from Basic Grey just ever so delicate and pretty? And check out that homemade flower. Too cute!

Supplies:
Basic Grey: Basic Kraft Paper Pack
- Paper Line Up Sheet
Tim Holtz Distress Inks: Pumice Stone
Basic Grey: Cappella Ribbon Doilies
Basic Grey: Cappella Stitched Brads
Basic Grey: Rhinestones - Ampersand (Diamond)
Tim Holtz: Advantus Paper Stacks - Shabby Vintage
FISKARS: Border & Corner Punch-Read Between
3” wide Aqua Blue Tulle (any brand)
Bazzill Basics: 12”x12” Cardstock
- Vanilla
- Bon Bon
Circuit: Tie the Knot Cartridge
- “Mr. and Mrs.” size 2 ½
Quickie Glue pen
Technique Tip: When creating homemade flowers, be sure to be as creative as you’d like! The more texture you create, the more interest you’ll gather. For the flower in this project, cut circles out as big as you want, but make sure that the first circle is the biggest as it will be the bottom part of the flower. Once the circles are cut, tear the edges and crumble the circles to give them texture.
INSTRUCTIONS
Step 1: Cut out the 12”x5” base of the card using the Basic Kraft Paper Line Up sheet. Ink the edges of the card with the Pumice Stone Distress Ink. Fold the paper in half to create a 6”x5” card.
Step 2: Within the Shabby Vintage Paper Stack, find a blue floral page and cut out a 6”x3” piece. Using your Fiskars Border & Corner Punch, punch one of the 6” sides of the paper. Use your Distress Ink again and ink the sides.
Step 3: Cut a 6” strip of the Blue Cappella Doily and glue it to the other 6” side of the Lost & Found piece of paper opposite of the side you punched. Glue the 6”x3” piece of paper to the bottom of your card. The doily should be in the middle of your card.
Step 4: Using your Tie the Knot Cartridge, take your Bon Bon cardstock and cut out “Mr.” and “Mrs.” in size 2 ½. With your Quickie Glue Pen glue down “Mr.” above the doily and “Mrs.” underneath it. In the space between the Mr. and the Mrs. attach the Basic Grey Ampersand Bling.
Step 5: To create your flower, cut out 3 circles from another blue floral page within the Shabby Vintage Paper Stack. The size of the flower will depend on how big you make the three circles. You will want one large circle and two smaller circles. For this project Lindsey cut out three circles: 1 ½”, 1”, and ¾”. Once the circles are cut, tear the edges and crumble the circles to give them texture. With your aqua tulle, cut out a circle about 1 ¾”. Place it between the 1 ½” and 1” circles. Next, place the ¾” circle on top of the 1” circle. Once all the layers are placed, take the brown Cappella Stitched Brad and stick it through all of the layers.
Step 6: Attach the flower to the left side of the Ampersand Bling on top of the doily.
How about another card for the happy couple? There are just too many great wedding card ideas out there!
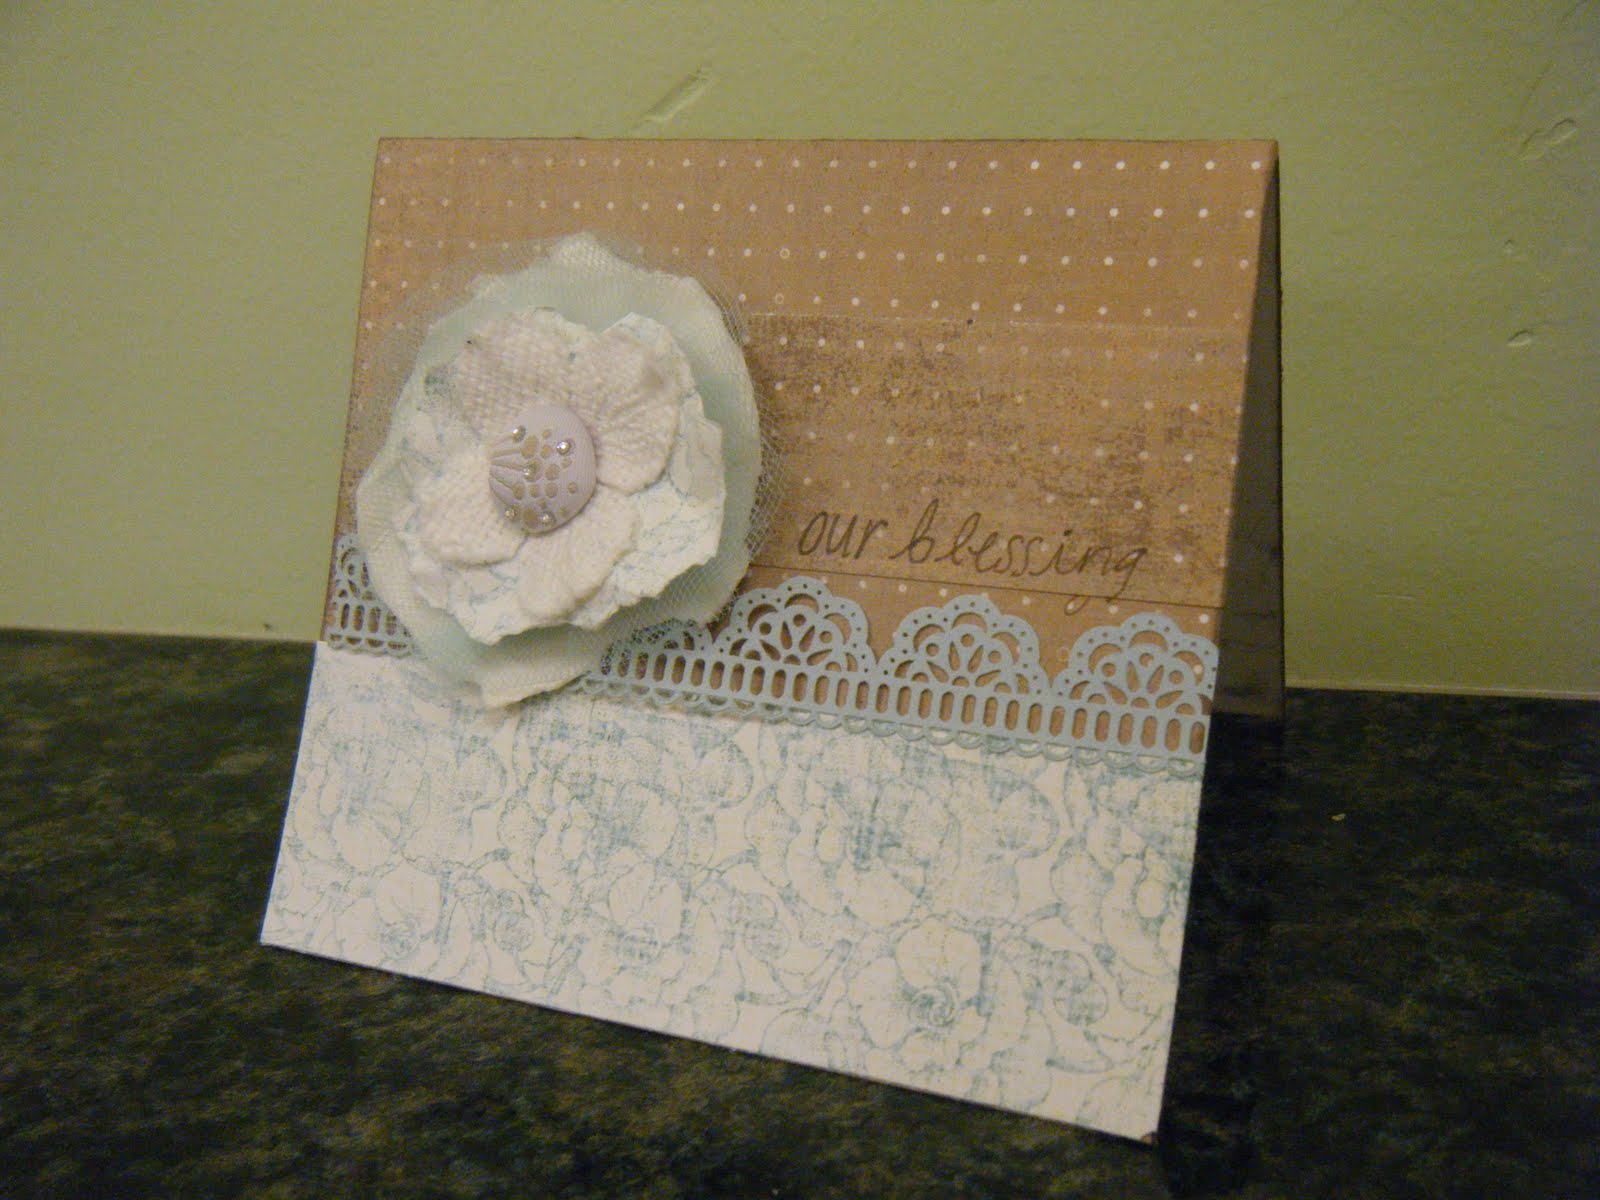
OMC loves the Cappella Ribbon Doilies from Basic Grey! Self-adhesive and simplistic in nature, these ribbons make perfect borders!

Supplies:
Basic Grey: Basic Kraft Paper Pack
- Paper Line Up Sheet
Tim Holtz Distress Inks: Pumice Stone
Basic Grey: Cappella Ribbon Doilies
Basic Grey: Cappella Stitched Brads
Quickie Glue Pen
3” wide Aqua Blue Tulle (any brand)
Bazzill Basics: 12”x12” Cardstock - Vanilla
Prima Flowers: Lime Green Calcutta Petals
Brown font marker (any brand)
INSTRUCTIONS
Step 1: Cut out the 12”x5” base of the card using the Basic Kraft Paper Line Up sheet. Ink the edges of the card with the Pumice Stone Distress Ink. Fold the paper in half to create a 6”x5” card.
Step 2: Within the Shabby Vintage Paper Stack, find a blue floral page and cut out a 2”x5” piece. Use your Distress Ink again and ink the sides.
Step 3: Cut a 5” strip of the blue Cappella doily and glue it to the top of your Shabby Vintage piece of paper to create a decorative edge. Glue the 2”x5” piece of paper to the bottom of your card. The doily should be in the middle of your card.
Step 4: To create your flower, cut out 2 circles from another blue floral page within the Shabby Vintage Paper Stack. You will also need a small Calcutta Petal about ¾”, that is mostly white in color. The size of the flower will depend on how big you make the two paper circles. You will want one large circle and one smaller circle. For this project Lindsey cut out two circles: 1 ½” and 1”. Once the circles are cut, tear the edges and crumble the circles to give them texture. With your aqua tulle, cut out a circle about 1 ¾”. Place it between the 1 ½” and 1” circles. Next, place the ¾” Calcutta petal on top of the 1” circle. Once all the layers are placed, take a cream or white Cappella Stitched Brad and stick it through all of the layers.
Step 5: Take your brown font pen and write “our blessing” above the doily. You can write other sayings as well such as: happy couple, congrats, husband and wife, or just wedding.
Don't worry, we aren't done yet! We have some more fabulous ideas for you, but you'll have to wait until tomorrow for the rest of our project ideas.
Happy Wednesday!


No comments:
Post a Comment