Leap at the Chance to Name Your Own Color!

Wednesday, February 29, 2012

It's time for a BLOG contest!

How to Enter:
Here’s a chance to name your own color of retired Bazzill Paper.* We’ve provide the rainbow colors, now is your chance to provide the name! Create a new name for the colors shown below by leaving us a comment on this blog post. Our OMC Design Team will select one new name for each of the colors to win. Each of the seven winners will receive a package of 30 colors of retired Bazzill paper. The winners will be announced in tomorrow's email blast, so make sure to check your email to see if you’ve won!

*Actual color name will not change. This is for contest fun only :)

RED:


ORANGE:

YELLOW:


GREEN:

BLUE:

INDIGO:

VIOLET:

Happy crafting!

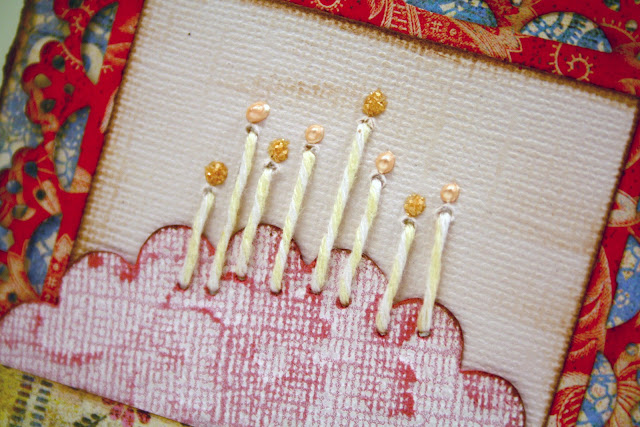
Birthday Cupcake Card

Monday, February 27, 2012

Birthday Cupcake Card
Created by OMC Designer Lindsey

Supplies Used:
Basic Grey : Picadilly Collection Pack

Bazzill Cardstock : 12" x 12" Vanilla

Tim Holtz : Distress Ink Pad - Walnut Stain

My Mind's Eye : Twine

Martha Stewart : Punch Around the Page - Vintage Flowers

Core-dinations : Jenni Bowlin 12x12 Assorted Paper - Vintage Brights

Sizzix : Framelites Die Set 8pk - Scallop Circles
Ranger Ink : Liquid Pearls

Ranger Ink : Stickles Glitter Glue
Tim Holtz : Distress Ink Pads

Instructions:

1. Cut the base to your card to size and ink the edges. Cut a piece of red printed paper the same size as you cut the base of your card. Use the Martha Steward punch around the edges. It will take off about 3/4" of the paper. Adhere this piece to the card base.
2. Cut a piece of the vanilla cardstock to fit in the center of the punched, red patterned paper. Adhere to the center of the red, patterned paper.
3. Use the scalloped circle die to cut out a circle of the vanilla cardstock sheet, then cut it in half. Ink the paper and the edges with a distress ink pad.
4. Take another contrasting print and cut a trapezoid shape for the shape of the cupcake wrapper. Cut the scallop circle to fit the wrapper. This is supposed to be the frosting of the cupcake. Adhere both the trapezoid shape and the cut scallop circle to the center of the vanilla cardstock.
5. Using a paper piercer tool, punch through all layers of the front of the card as seen in the picture below. Determine how many candles you want before you start piercing the paper.String twine through the holes to make the candle lines.
6. At the top of the candles, add the Ranger Ink Liquid Pearls and Stickles to make the flames of the candles.

Happy crafting!

Glamour Girl Card (Teen Card)

Saturday, February 25, 2012

Glamour Girl Card
Created by OMC Designer Lindsey
This card was designed especially for Teenage Girls!

Supplies Used:
Basic Grey : Little Black Dress
POW : Silver Glitter Paper
Glossy Accents
Stampendous : Clear Stamps - Altered Alphabet
Clear Stamping Block
Ranger Ink : Stickles Glitter Glue - Silver
Imaginisce : i-Rock Tool
Martha Stewart : Edge Punch - Beaded Arcs
Tim Holtz : Distress Ink Pad - Black Soot
Bazzill Basics : 12x12 Classic Red Cardstock
Doodlebug : Glitter - Black, Pink
Black Marker

Instructions:
1. Cut out the base of your card to 5" x 4 ½" and ink the edges with Black Soot ink pad. Cut a piece of the glitter paper 4" x 4" and adhere it to the front of your card. Trace around the glitter paper using a black marker.

2. To make the lipstick case, cut out a strip of the leopard print paper 2" x ½" and outline the edges with the black marker. Cut a piece of red cardstock 1" x ¼" and cover completely with Glossy Accents. Sprinkle glitter onto the Glossy Accents while it is still wet and set aside to dry.

3. To make the lashes, cut out the basic lash shape. Then cut little snips into the lash to create the look of lashes. The more snips you make the better it will look. Don’t cut gaps in the lashes or they won’t look right. Apply a light layer of glossy accents and add black glitter. Set aside to dry.

4. To make the purse, cut out the basic purse shape out of the leopard print paper. Cut a triangle out of the same paper to work as the flap of the purse. Outline the flap with a black marker. Mount the purse on red cardstock, then cut out the shape leaving a little out line of red around the purse.

5. To make the lips, cut out the basic lips shapes out of red cardstock. Cover the shapes with Glossy Accents, sprinkle glitter over the Glossy Accents and set aside to dry.

6. Once all accessories are dry, mount them onto the card.

7. Stamp the phrase "Glamour Girl" using the Stampendous stamps onto red cardstock. Cut out and mount at the top of the card.

8. For the inside of the card, cut a piece of red cardstock 3 ¾" x 3 ½". Punch the bottom edge and adhere to the inside of the card. Cut a strip of the leopard paper to fit inside the center of the card. Score down the center of the strip and adhere to the crease of the card.
For reference, see the image below.

Happy crafting!


Spring Quilt with Riley Blake Fabric

Friday, February 24, 2012

Ashley at Mommy by Day Crafter by Night made a beautiful quilt using Riley Blake Fabric. Don't you just love the spring time colors? Head over to her blog for instructions and to see more pictures!

Products Used:

Riley Blake : 5 INCH STACKERS BUNDLE: SUNNY HAPPY SKIES


 Happy Crafting!

Tim Holtz - Distressed Color - Twitter Contest!

Wednesday, February 22, 2012


How to Enter: 
Tweet #ohmycraftscom and #Go2Color along with what Tim Holtz product and color you go to in your time of need.  Is it a distress pad?  An Alcohol Ink?  We want to know!  Three lucky winners will be randomly selected to win a set of Tim Holtz Adirondack Alcohol Inks!

Contest Starts: Wednesday, February 22nd, 2012 - Now
Contest Ends: Wednesday, February 22nd, 2012 - 11:59 PM


Good luck and happy crafting!

Irish Blocks

Tuesday, February 21, 2012

Irish Blocks
2. Sand the sides of each block using sandpaper or rough nail file.
3. Ink each side of the wood where you sanded it to give it a distressed look, using Inkssentials Blending Tool with Tim Holtz Distress Ink Pad - (Vintage Photo color).
4.  Mod Podge each side of the block and let dry.
5. Cut out 3 - 41/2"x21/2" pieces of Daydream Spot Glitter cardstock - Limeade. Round corners using the EK Corner Rounder Punch.
6. Cut out 2 - 31/2"x21/2" pieces of Sweet Pea Sugar Coated cardstock. Round corners using the EK Corner Rounder Punch.
7. (Optional) Emboss each piece of paper with your favorite embossing folder.
8. Ink the edges of each paper using the Inkssentials blending tool and the Versafine Onyx ink pad.
9. Attach each paper to its piece of wood using Mod Podge on the back of each piece of cardstock. 
10. Press firmly to make sure it is attached.
11. Using your cutting machine, cut out the letters I,R,I,S,H in the font of your choice.  For this project we used the Sizzix Eclipse Happy Shape & Alphabet.
12. Attach each letter to the blocks using Inkssentials Glossy Accents.  Let dry.
13. Make 3 dots in each corner of the cardstock with Stickles, Lime Green and Black Diamond glitter glue.  Let dry before touching so you don't smudge your Stickles!
  
Happy crafting!


Luck Blocks

Monday, February 20, 2012

Luck Blocks
Created by OMC Designer Jill
  
Supply List:
Mod Podge (Coming soon to OMC) 

Instructions: 
1. Paint each block with My Color Phantom black paint.  Let Dry.
2. Paint each block with a coat of Mod Podge.  Sprinkle lightly with Glitter Ritz DK Gold glitter and let dry.
3. Cut out one 2 1/2"x 21/2" square out of each of the four different cardstock colors.
4. Ink the edges of each square with Versafine Onyx ink using the Inkssentials Ink Blending Tool to blend it easily and give it that distressed look.
5. Coat the back of one of the squares of cardstock with Mod Podge and center it on one of the blocks of wood.  Press firmly to make sure it is attached well.  Do this with all four pieces of cardstock and let dry.
6. Cut out 2" letters spelling LUCK with whatever font you would like out of OH My Vinyl - Gold Flake and cut out a corresponding shadow with POW Glitter Paper - Black.
7. Glue the black glitter shadow to the back of the gold glitter letter (gold glitter vinyl is sticky on the back so this will help).  Then use hightac tape to glue one of each letter set onto one block so that the blocks spell out LUCK.

Happy crafting!


President's Day TalkingTag Contest Part Two!

Sunday, February 19, 2012


How to Enter:  


Follow this link to our Oh My Crafts Facebook Page.  
Leave a comment on the photo, telling us what you would say on your Sizzix TalkingTag, who the message is for and what project you would attach it to. The 20 fans with the most "likes" on their comment will be sent a Sizzix TalkingTag before they are even released. These are not available until March! Tell your friends that "liking" your comment gives you a vote. TalkingTag labels give voice to quilts, cards, scrapbook pages and all of your crafting projects.

Contest Starts: Sunday, February 19th - Now!
Contest Ends: Sunday, February 19th, 11:59PM 

Good luck and happy crafting!

President's Day TalkingTag Contest Begins Now!

Saturday, February 18, 2012

 How to Enter:  
Follow this link to our Oh My Crafts Facebook Page and tag yourself in the President's Day Weekend Contest Picture.  The first 50 fans to tag themselves will be sent a Sizzix TalkingTag before they are released.  These are not available until March!  TalkingTag labels give voice to quilts, cards, scrapbook pages and all of your crafting projects.

Contest Starts: Saturday, February 18th - Now!
Contest Ends: When the 50th person has tagged themselves in the contest photo


Good luck and happy crafting!


Talking Tags Are Almost Here!

Friday, February 17, 2012

TalkingTags are coming! 

We are very excited about these fun little labels that allow you to add a personal message to any and all of your crafting projects.  (Watch video for details) We're here to give you yet another reason to love them... we are giving them away BEFORE they are released for purchase in March! The lucky winners of this give-away will get a TalkingTag of their very own.

Winning this contest couldn't be easier, so stay tuned to our facebook page for the contest details coming very, very soon...


Amy Tan Contest!

Wednesday, February 15, 2012

It's time for a Youtube Contest!


How to Enter:
Watch and like the video on our Oh My Crafts Youtube channel that introduces the new Sketchbook line from Amy Tan! Leave a comment on the video telling us why you are excited for Amy Tan's new line! One lucky winner will be selected to win a signed tote bag and some fun embellishments!

Contest Starts: Wednesday, February 15th @12:01 AM
Contest Ends: Wednesday, February 15th @ 11:59 PM


Good luck and happy crafting!
Valentines Cone Banner

Tuesday, February 14, 2012

Valentines Cone Banner
Created by OMC Designer Lindsey

Supplies Used:
Doodlebug : Sweet Love Paper Pack
Sizzix : eclips Cartridge - Decorate Your Life
EKSuccess : Ek Tool - Heart Layering Punch
Lifestyle Crafts : Rosettes
Inkssentials : Glossy Accents
Red Twine
Black Glitter

Instructions:
1. Cut the largest circle you can out of a 12" x 12" patterned paper and roll it into a cone. Adhere the edges of the cone together. Repeat three times to give you a total of four cones.
2. Cut coordinating hearts for the top. You'll want to cut two sizes of hearts. Cut the solid largest heart first, then cut the next size down. Fold each heart in half. Layer and attach the hearts at the top of the cones.
3. Cut out four rosettes and adhere the circles to the centers. Punch holes at the top on either side.
4. Cut out the word "LOVE" out of black cardstock. Cover the letters with Glossy accents and sprinkle black glitter over the letters. Glue the letters to the centers of the circles of the rosettes.
5. Punch two holes in the back along the top of each cone. String the twine through the holes and tie together. Do this for each cone.

Happy crafting!

Lucky in Love Layout

Monday, February 13, 2012

Lucky in Love Layout
Created by OMC Designer Lindsey

Supplies Used:

Basic Grey : Picadilly Collection Pack
Tim Holtz : Distress Ink Pad - Rusted Hinge, Crushed Olive
Core'dinations : Cosmo Cricket 12x12 Assorted Paper - Classics
Bazzill Basics : 12" x 12" Vanilla Cardstock
Sizzix : eclips Cartridge - Decorate Your Life
Martha Stewart : Punch Around the Page - Ribbon Loop
Stampendous : Clear Stamps - Altered Type Alphabet
Brown Twine

Directions:

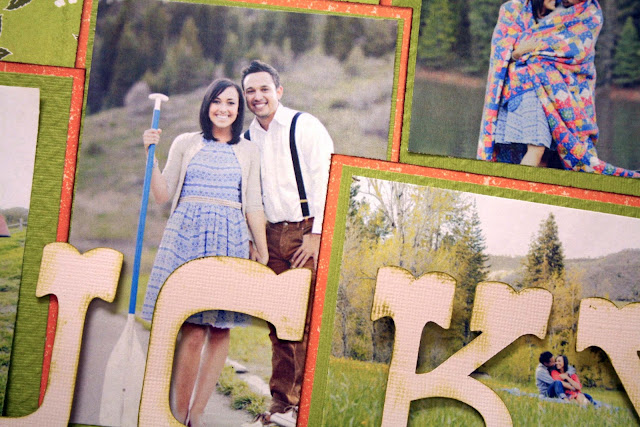
1. Select a paper from the Picadilly Collection Pack and ink the edge of the page with the distress inks. Cut out coordinating papers to fit the size of the desired pictures you'd like to mount on your page. 
Attach the pictures to the paper mounts, then attach them to the layout page. Don't be afraid to layer the pictures!

2. Cut out the word "LUCKY" and ink the edges of the letters.  Add foam squares behind the letters to get them to stand out and attach to the page on top of the bottom edges of your pictures.

3. Cut a 5 1/2" strip of twine. Cut out six triangles and stamp "In Love", one letter on each triangle. Glue the triangle pieces to the twine to create a banner. Attach the banner over the the "k" and "y".

4. Punch a strip of paper using the punch. Cut another strip of paper for underneath the punched paper, and use scissors to cut little snips in the bottom to create a frayed look. Use a skinny paint brush to wrap the paper around and make it curl.

Photographer: Rebekah Westover


Happy crafting!

Crazy Love Heart

Thursday, February 9, 2012

Crazy Love Heart
Created by OMC Designer Jill

Supply List:

Doodlebug : Serenade Spot Glitter Cardstock - Bubblegum
Doodlebug : Jewels - Bubblegum
Oh My Crafts : My Color Acrylic Paint - Phantom
Tsukineko : Versafine Ink Pad - Onyx Black
Tim Holtz : Adirondack Alcohol Ink Applicator
Bazzill Basics : 3" Tulle

Instructions:

1. Paint the edges of the swirly heart with whatever paint color will work best with your project. I like the black because it make the paper pop! Allow paint to dry.
2. Trace the shape of the swirly heart onto the Doodlebug cardstock. Take care to get all edges.
3. Cut out the shape making it slightly bigger than the wood.
4. Attach the glittered cardstock to the wood using a good amount of Mod Podge. Press firmly on the paper to press out any bubbles.
5. Sand the edges of the wood to take off any excess paper that may be hanging over.
6. Ink the edges with whatever color works best with your project. I used Versafine Onyx with a Tim Holtz Ink Applicator.
7. Apply Doodlebug jewels randomly and tie a tulle bow around the top left part of the heart!

Happy crafting!

Bobunny New Release Contest

Wednesday, February 8, 2012

It's time for a BLOG contest!

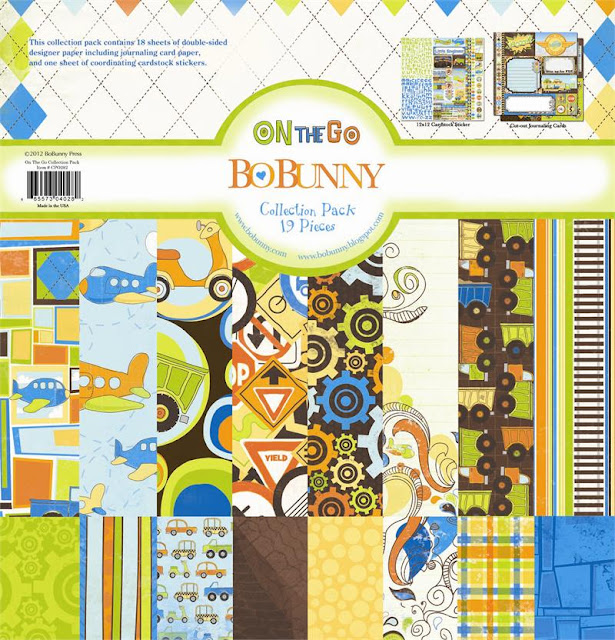
BoBunny is releasing six new lines for 2012: Weekend Market, Serenity, Alora, Country Garden, Ambrosia, and On the Go! We have them on Pre-Sale on our website, but one lucky person will be selected to receive a FREE collection kit of On the Go before any of the other collections are released!

How to Enter:

Tell us what you'd make with BoBunny's new
collection "On the Go" for a chance to win! One winner will be randomly selected to win. The winner will be announced tomorrow, February 9th.

Contest Starts: Wednesday, February 8th @ 12:01 AM
Contest Ends: Wednesday, February 8th @ 11:59 PM


Good luck and happy crafting!

Love Squared

Monday, February 6, 2012

Love Squared
Created by OMC Designer Jill


Supply List:
Wood Designs : Love Squared
Oh My Crafts : My Color Acrylic Paint - Phantom
Tim Holtz : Adornments - Charms
Tim Holtz : Locket Keys by Tim Holtz
7 Gypsies : Hardware : Chains w/ Clasp
Elizabeth Craft Design : Glitter Ritz - Regal Red
Tsukineko : Versafine - Onyx Ink Pad
Tim Holtz : Adirondack Alcohol Ink Applicator
Mod Podge

Instructions:

1. Paint the sides of the wood with the acrylic paint.
2. Paint the face of the wood in sections using a good amount of Mod Podge. Sprinkle a heavy amount of the Glitter Ritz over the wet Mod Podge. Paint another section with Mod Podge and again sprinkle a heavy amount of glitter to cover. Continue to do this until the whole face is covered.
3. Shake excess glitter off onto a blank piece of paper. Put the glitter back into the jar for future use!
4. Ink the edges of the wood with the Onyx Ink pad and the Tim Holtz tool.
5. Once dry you can embellish by hooking two of the chains together around the O. Then hook the adornments and lockets onto the chain so they will hang down.

Reminder: Collect your extra glitter by dumping it off onto a blank sheet of paper and creasing it so the glitter just flows right back into the bottle!

Happy crafting!


Layered Heart

Sunday, February 5, 2012

Layered Heart
Created by OMC Designer Jill 


Supply List:

Wood Designs : Layered Heart
Ranger Ink : Stickles Glitter Glue - Xmas Red
Bazzill Basics: Bling Stones - Kisses (Red)
Oh My Crafts : My Color Acrylic Paint - Phantom
Tim Holtz : Distress Ink Pad - Vintage Photo
K&Company : Designer Paper Pack - Circus Valentine
Mod Podge/Sponge Brush

Instructions:

1. Trace the shape of the piece of wood onto the patterned cardstock you want to use.
2. Cut it out.
3. Place the cut out paper onto the wood using Mod Podge. Apply a pretty thick layer as Mod Podge dries quickly. Press firmly and smooth out any bubbles. Make sure your edges are smoothed down well.Take care not to get too much Mod Podge on the edges of the paper because the distress ink works better on just the paper.
4. Once the Mod Podge is almost dry, sand any extra paper off the edges.
5. Ink the edges of the paper and the wood with the Tim Holtz distress ink. I love using Vintage Photo for brown, well-worn looking edges!
6. Apply another coat of Mod Podge over the top of the paper, but be warned that Mod Podge will smear the ink. I like this effect! Let dry and then embellish with the Stickles and Bling Stones. Apply any other embellishment that you like. Take note that Stickles take a bit of time to dry so be careful not to smudge with your hand as you are working on your project!

Happy crafting! 


LinkWithin

Related Posts with Thumbnails