Memorial Day Contest WINNERS!

Tuesday, May 31, 2011

Thanks to everyone who participated in our Memorial Day Contest! We hope you all had a fabulous weekend.


The five winners of this contest are:
 

swtcherry81 said...
All of the men in my family have been in the service, but this Memorial Day I am going to be scraping pictures of my brothers time in the Marine Corp. including his times over seas. Sempre Fi Thank you to all service men and women for your services!!


Johnson Academy Momma said...
My cousin John gave his life saving a fellow soldier during combat in Vietnam in April of 1970. He received the Distinguished service cross for his bravery in combat. I am putting together a page to memorialize his great sacrafice for our country and our freedoms. I am extremely proud of his service as I am of all the men and women in my family who are currently active and have served. My husband also will get a page this weekend for his service in the Air Force. He served 5 tours overseas in wartime and is a hero to his daughter and I. I celebrate this holiday with pride and love.


Anonymous said...
I'm finishing up my dad's scrapbook. He was in the Army during WWII, served in the Pacific, was taken prisoner by the japanese. Thank God he survived the Bataan Death March and the time he spent imprisoned in japan. I am making copies for all my siblings.


Tami B. said...
I will be making cards for OWH in honor of James, Preston, Richard, and all the other brave men and women who are so bravely serving our great country.


Crystal said...
I'm making scrapbook pages for my hubs family. His granddad (WWII) and great granddad (Civil War) were all in the service. I have great pics to work with!!!


Winners, please send your shipping information to contest@ohmycrafts.com to claim your prize.
Check back later for more fun contests and chances to win!


Happy crafting!


Such a Sweet Little One

Monday, May 30, 2011

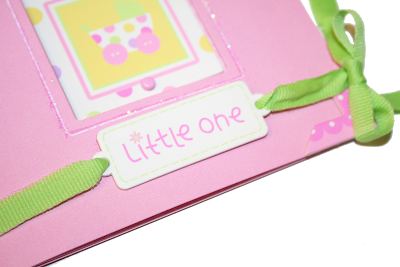
“Little One” Card created by OMC designer Whitney

Supplies Used:

Doodlebug : Create-A-Card Rainbow Set - Square Baroque Card & Envelope

Doodlebug : Ribbon Packs - Stitched Grosgrain
Doodlebug : Whimsy Wafers Chipboard Sticker Pack
Doodlebug : Sugar Coating Glitter
Quickie Glue Pen


Instructions:


1. With Quickie Glue Pen, draw a line around the white border and cover with pink glitter.

2. Add pink corners to the right side from Whimsy Wafers Chipboard Sticker Pack.


3. Add stroller chipboard sticker inside the frame with two pink brads.


4. Thread green grosgrain ribbon through the “Little One” chipboard sticker, wrap around the entire card and tie bow on the right side. Fray the ends.


Happy crafting!


Let's Kit Together!

Saturday, May 28, 2011

Did you know that the Doodlebug Let's Kit Together packs come with instructions for multiple projects including cards, layouts, tags, and more?

We had our design team h
ere at OMC put together the project for the Let's Kit Together Baby Girl pack to show you just how cute these projects can be!


First we have some precious layouts!


And how about a card for that upcoming baby shower?


Of course if you are having a baby shower you're going to need invitations...

And then how about a door hanger for when baby is sleeping?


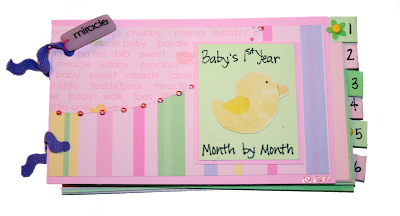
And last but not least, an adorable baby booklet to keep all those memories close at hand!


There are so many possibilities with these kits! You can follow the instructions or create your own projects. Each Let's Kit Together pack comes with instructions for multiple projects so you'll never run out of cute ideas. Better yet, you can reuse the instructions with other paper pack and embellishments! What a deal!


Happy crafting!

Memorial Day Contest

Friday, May 27, 2011

Memorial Day is a special day for many people and we'd like to help you celebrate and remember with a contest!


Who are you crafting for in remembrance of this Memorial Day weekend? We want to know who you are crafting for or about and why. You can enter the contest by leaving us a comment on this post (please only post once - all comments must be moderated before they are published so don't worry if you don't see your comment straight away). Five random winners will be chosen and announced on Tuesday, May 31st to receive a spec
ial prize from OMC.


Have a great long weekend and don't forget to stop for a moment and remember.

Happy crafting!
Imaginisce Contest WINNERS!

Thursday, May 26, 2011

We have winners! Thanks everyone who participated in our contest. We hope you enjoyed the projects over on the Imaginisce blog as much as we did!


Here are the three contest winners:


Jennyplace2 is the winner of Prize 1: The d-stress tool!


jennyplace2 said...
What a fun contest! I love everything to do with the I Rock, they just came out with three wonderful new stencil to make my life a lot easier and then they came out with some awesome new hock rocks compack rhinstones hot rocks compack jewels and also hotrock compack glitter. Thanks for the chance to win.


Beverlyd is the winner of Prize 2: The i-rock tool and a Jewels Hot Rocks Compact!


beverlyd said...
The Happy Camper is soo cute!!! I love the smores treat bags...genius!!! I will be watching OMC to see when they get this Happy Camper pack...I am in looove!!! :-)
 

Pat is the winner of Prize 3: A pink
Jewel Tray, and two Hot Rocks Compacts - Pink, Black, and Clear, and Glitter! 


Pat said...
I love the project made with the "I Love America" paper. Even though it is a 4th of July project, it could easily be changed to be for Memorial Day....of Labor Day. The paper is amazing and I love all the bling on it.
May 25, 2011 11:16 AM


Congratulations winners! Please send your shipping information to contest@ohmycrafts.com to claim your prizes.
 

Make sure to check back tomorrow for our Memorial Day contest - you won't wanna miss it!


Happy crafting!

Gift and Money Cards

Wednesday, May 25, 2011

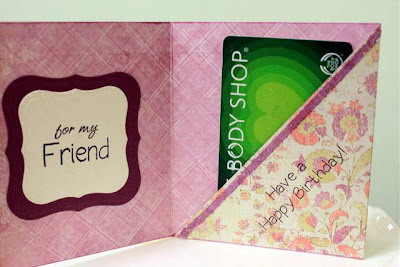
We have so many occasions where we might give a gift card or some money: weddings, birthdays, graduations, recognition for a job well done, etc. The concept of this card can be adapted for any occasion with just a simple change of paper.


Supplies Used:

Oh My Crafts: cardstock: white, blue, purple, acid-free craft tape
Fancy Pants Design: Lilac House and To the Moon Collection Packs, rub-ons
Glitter Ritz: Cool Highlights and glitter magnet, Be Creative tape
3 L: foam squares
Copic markers: Ciao V15
Martha Stewart: scoreboard
My Pink Stamper: Everyday Life
Pink By Design: Simply Everything
Martha Stewart punches: Cherish and Bubblebath
Spellbinders: Labels One S4-161
Fiskars: trimmer


Gift Card Holder:

1. Trim double-sided paper to 10¾" x 4".
2. Make one score at 3½" and the next score line 3½" from the first one. Fold on score lines.
3. Insert right section of card into trimmer and line up from the last score line (closest to right side) on a diagonal to the opposite corner. Once trimmed, fold on score line to make pocket. Use the acid-free craft tape along the bottom of diagonal section and glue together. Ink edges with matching color.
4. Trim a 1" or 1½" piece of contrasting paper for the belly-band. Fold around entire card with the ends matching in the middle on the top with a 1" overlap.
5. Cut a 3¼" square of dark cardstock and punch corners first and then edges with Martha Stewart punches.
6. Cut a 2" square of light cardstock and die cut bracket shape using Spellbinders Label One. Apply rub-on to bracket.
7. Mount the light colored cardstock (with foam squares if desired) to dark cardstock. Then attach cardstock layer to belly band.
8. For inside cover, depending upon card, apply sticker or cut 2 more bracket shapes and layer. Stamp with sentiment. Use a quickie glue pen to trace around bracket and then apply glitter. Shake off excess.
9. If desired, place Be Creative tape just barely away from diagonal edge. Remove liner, cover with cool highlights. Shake off excess and rub finger over glitter.
10. Stamp sentiment on diagonal pocket.
11. Color glitter line in with Copic marker.
12. Slide belly-band over card.


Tips:

-Outline stickers or brackets to give a little more dimension.
-Craft tape is very strong and great for holding pockets in place.
-Covers can be embellished even more.


Happy crafting!
Imaginisce Contest!

Tuesday, May 24, 2011

It's contest time! For this contest we teamed up with Imaginisce!


They very kindly donated our prizes for this contest, but we'll get to those later.

For the contest, we want you to hop on over to the Imaginisce Blog and take a look around! Find your favorite project, come back to the OMC blog, and leave us a comment about the project you liked best. We want to know why you liked the project so much. Was it the design? The cute embellishments or paper? We want to know what you think makes the Imaginisce collections so stinkin' cute! (Please make sure to include the title of the project if it has one.)

Now, on to the good stuff! This contest will have three winners which will be chosen and announced on Thursday, May 26th, at 2 PM Mountain Time. Check out the awesome prizes below!


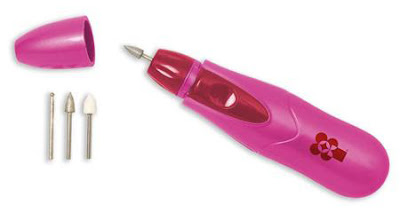
Prize 1: The d-stress tool!


The hassle free way to distress your edges! Now it's easy to get that archival touch for photos, cards, and other paper crafts - right down to the finest detail.
- Cordless
- Uses 2 AA Batteries
- Comes with 3 different crafting tips
- Portable
- Ergonomic Design


Prize 2: The i-rock tool and a Jewels Hot Rocks Compact!

i-rock
This tool will rock your world! The i-rock will permanently affix rhinestones, jewels, pearls, or mirrors to paper, fabric, or even furniture to create a dazzling masterpiece! It's so easy! No need for messy glue. And with it's stylish pink design, you might even want to carry it just as a fashion statement... I do!

Hot Rocks Compact - Jewel

Tuck it into your purse, or even the glove box of your car. This compact is a real beauty! Each mini hot rock is self-adhesive and just needs a touch from the i-rock tool to totally dress up any project. And you get 800 or more of them! Lucky you!
For use with the i-rock tool.
800 jewel-colored gems
4mm


Prize 3: A pink Jewel Tray, and two Hot Rocks Compacts - Pink, Black, and Clear, and Glitter!


Pink Jewel Tray

1 - 3" x 4.75" x 0.75" plastic tray

Hot Rocks Compact

Tuck it into your purse, or even the glove box of your car. This compact is a real beauty! Each mini hot rock is self-adhesive and just needs a touch from the i-rock tool to totally dress up any project. And you get 800 or more of them! Lucky you!
For use with the i-rock tool.

Pink, Black, and Clear

800 pink, black, or clear gems
2.3mm-6mm

Glitter
800 gems - pink, red, gold, white, blue, green
4.5mm & 6mm


You can check out all the other Imaginisce i-rock products by clicking HERE!


Make sure to leave your comments on this post and good luck!

Graduation Contest WINNER!

Monday, May 23, 2011

Thanks to everyone for sharing your graduation stories with us. We loved reading the stories whether funny, serious, or inspirational!


The winner of this contest is Melissa Dunham!


Melissa said...

"I received my degree 2 weeks ago at the age of 45. I did it while raising a family and going back full time after being laid off from a part time job. While doing this I was on the deans list every semester and was a member of Phi Thetta Kappa. I am now a very proud mom who has a college degree. While going back this last year my youngest daughter has been struggling in high school. She finally managed to bring all her grades up and as I was telling her I was proud of her she said "mom I'm proud of you too!" We did a high 5 to each other."


Congrats Melissa! Please send your shipping information to contest@ohmycrafts.com to claim your prize.


Thanks again everyone and happy crafting!

I'll Bee Here for You!

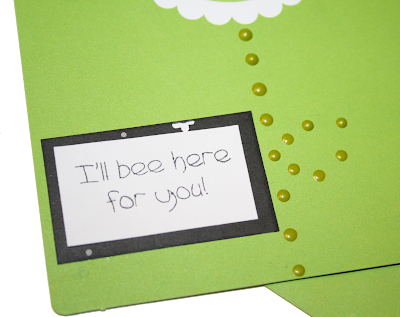
“I’ll Bee Here for You!” Card created by OMC designer Whitney!


Supplies Used:
 

Doodlebug : Create-A-Card Rainbow Set - A6 Swiss Dot Card and Envelope 
Black, Yellow, and smooth white paper 
Sizzix : Bigz Die - Fanciful Flight by Tim Holtz 
Viva Décor : Pearl Pen - Kiwi and Black  
My Pink Stamper : Tweetie Hoo Puns and Black Ink 
3L Foam Squares - White Pack


Instructions:

1. Using Fanciful Flight Die, cut out a bumble bee using the two smaller wings, the body and the wing backgrounds with black and pale yellow paper. Adhere to the top right corner of card with foam squares.


Tip: Add Mod Podge or crackle paint over the assembled bee to create a shiny finish.

2. Stamp “I’ll bee here for you!” on smooth white paper and trim around the edges. Adhere to black paper and trim, creating a thin border. Adhere to bottom left corner of card.


3. With Viva Décor Pearl Pen, create a stem and leaf by adding green dots down from the flower.
4. Again, with Viva Décor Pearl Pen, add black dots along the scalloped border of the envelope. Set aside to let dry.


Happy crafting!

Lilac House Card and Case

Saturday, May 21, 2011

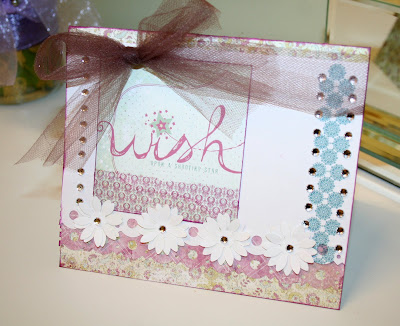
Lilac House Card and Case by OMC designer Whitney!

Card

Supplies Used:
 

Fancy Pants : Lilac House
Martha Stewart : Deep Edge Punch: Footlights
Lifestyle Crafts : Fresh Start Cutting Dies- Bloom
Clearsnap : Colorbox Classic Pigment Ink-Boysenberry
Tulle - Brown
Bazzill Basics : Jewels - Clear


Instructions:


1. Cut Lilac House patterned paper 9 ¾”x 5 ¾”. 
2. With Footlights Punch, punch lilac patterned paper 5 ¾”x2”. Adhere ½” from the bottom. 
3. With Footlights Punch, punch white paper 5 ¾”x 5”. Adhere just above the lilac paper, leaving a thin strip of patterned paper showing at the top.  
4. Ink the edges with Boysenberry ink pad. 
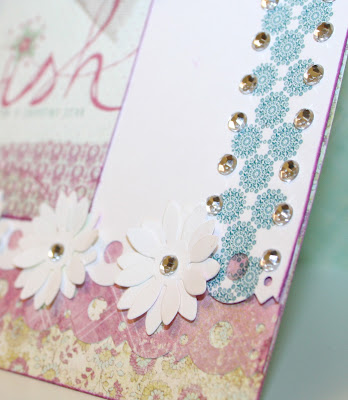
5. Die cut 8 white small flowers, but layer one on top of the other to create four flowers. Apply a small jewel in the center of each flower and adhere to the bottom of the scalloped white paper.

Tip: With thin paper, the die cut can cut through 3 sheets at a time.
 

6. Cut out “Wish” from paper pack and ink the edges with Boysenberry ink pad. Apply the purple border rub on to the bottom of the sentiment. Adhere to left side of page.


7. On right side of card, apply the blue border rub on.  
8. Adhere a line of jewels to the left of the sentiment and on both sides of the blue rub on.  
9. Finish with brown tulle tied in a bow at the top of the card.


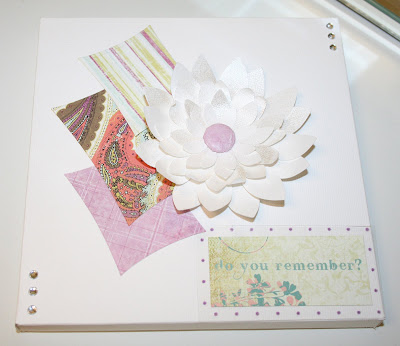
Case

Supplies Used:

Fancy Pants: Lilac House
Bazzill Basics : 12”x24” Cardstock
Spellbinders : Nestabilities - Wonky Rectangle
Imaginisce : I-top brad
Tattered Angels : Glimmer Mist - Pearl
Lifestyle Crafts : Fresh Start Cutting Dies- Bloom
Bazzill Basics : Jewels - Clear
Box to trace (Letterpress Printing Plates)


Instructions:
 

1. Trace a box onto white cardstock and make folds, but do not assemble yet. This box was traced from the Letterpress Printing Plate packaging.  
2. Die cut 2 small and 1 medium sized Spellbinders Nestabilities: Wonky Rectangles with Lilac House patterned papers. Layer and adhere to front of box.  
3. Die cut several layers of the Lifestyle Crafts flower cutting die with white paper. This flower has 6 layers of petals.

Tip: The petals curl upward because I sprayed them on both sides with Tattered Angels Glimmer Mist color Pearl. This gave them the flexibility to curl on their own. You can also shape them how you want with a pencil or your fingers.  


4. With I-top, create a 16mm brad using coordinating lilac paper. Punch a hole with Tim Holtz Retractable Craft Pick through the center of each flower and stick the brad through the center.  
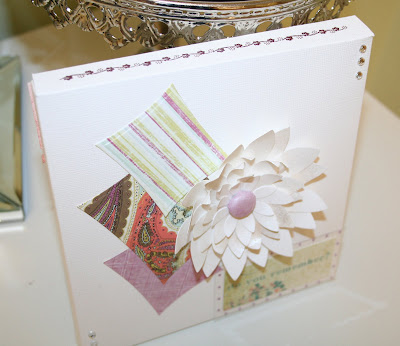
5. Adhere the flower to the center of the box, slightly over the rectangles.


6. Cut “Do you remember?” out of Lilac House kit and layer with acetate purple dot paper also from the Lilac House kit. Adhere to the bottom right of the box.  
7. Apply 3 jewels to the bottom left and top right of the box.  
8. On the top fold of the box, apply a brown vine rub on from Lilac House kit.


9. Assemble box and put a CD, card, gift card, or other small item inside.


Happy crafting!
Graduation Giveaway!

Friday, May 20, 2011

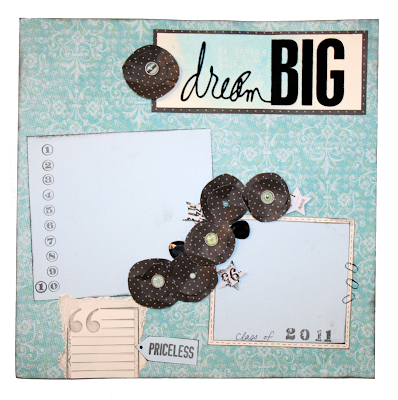
Who'd like to win an adorable graduation layout and some fun embellishments? Well here's your chance!

For this contest, we want to hear your graduation stories - did something funny happen? What is the one thing you remember best? What made it unique for you? This can be a story about yourself or your children, but please, no distant relatives :)


Please leave us a comment along with your name on this blog post for a chance to win. One random winner will be chosen to receive this fabulous graduation layout created by OMC designer Lindsey as well as some fun embellishments! The winner will be announced on Monday, May 23th.


Here's a little about the layout:

This background for the layout is a double-sided page from the new K&Company Abrianna Collection Paper Pad. The stamps are from 7gypsies and Teresa Collins, and the velvet lettering at the top is from Tattered Angels!

There are lots of great embellishments on this layout for you to enjoy. The adorable paper flowers were made out of the Imaginisce Love & Cherish Collection pack. The little star embellishments are Basic Grey Small Details Decorative Stickers. There are also baubles, brads, and tiny paper clips!


The layout includes two paper backdrops perfect for graduation pictures or journaling!


Don't forget to leave a comment and good luck!

Congrats Class of 2011!

Thursday, May 19, 2011

Graduation Frame created by OMC designer Whitney!


Supplies Used:
 

Twelve Timbers : 4”x6” Frame
Rangers Ink : Jenni Bowlin Acrylic Paint Dabbers - Fountain Pen and coordinating color  
Oh My Vinyl : Metallic Silver, Black and Transfer Tape
Kanban Crafts : Duo Mirror Reflective - Copper/Black
Cricut : Happy Graduation, Songbird, and Base Camp Cartridges
7Gypsies : Display Trim: Loops and Hooks - Antique Silver
Graduate’s Tassel


Instructions:
 

1. Remove the glass from the frame.
2. Paint the frame with Ranger Ink paint dabbers and let dry. Paint the entire frame black, or paint the sides the color of the graduate’s tassel or school colors.

Tip: Ranger Ink Paint Dabbers dry super fast and are quick and easy to apply.


3. With Cricut machine, cut out the following:
Cartridge
Material
Words to Cut
 Size in Inches
Blade Depth
Pressure
Speed
Happy Graduation
Metallic Silver Vinyl
"Happy Graduation"
3 1/2
4
Low
Medium
Songbird
Metallic Silver Vinyl
"Class Of"
1 1/2
4
Low
Medium
Base Camp
Metallic Silver Vinyl
"2011" Shadow
1 3/4
4
Low
Medium
Base Camp
Black Vinyl
"2011"
1 3/4
4
Low
Medium
Happy Graduation
Kanban Reflective Paper- Black
Graduation  Cap
3 1/2
4
High
Medium

4. With “Happy Graduation” cut off the “Happy” so you are left with “Graduation.” Do not forget to cut off the dot to the “i.” 
5. Using transfer tape, apply the vinyl to the frame. Start with “2011,” laying one number down at a time. Then stick “Graduation” down at the bottom, bringing it close to, but not touching the “1”. Lastly, apply “Class Of.” Since these letters are not welded together, apply each one separately, but overlap them slightly so they are close together and they look welded. 
6. Ink the white edges of the graduation cap black and adhere to the top left corner of the frame. 
7. Adhere one antique silver 7 Gypsies hook onto the graduation cap and tie the graduate’s tassel on. 
8. Insert the glass and graduate’s picture in the frame for a perfect graduation gift!


Happy crafting!

LinkWithin

Related Posts with Thumbnails