
Instructions provided by OMC designer Whitney
The I-top is such a fun and easy way to make your own brads!

When you buy the tool, you should receive a CD demonstrating how to use the tool, but here is a little additional information you might enjoy:
There are 3 sizes of brads available: 16mm, 22mm, and 28mm

When purchasing the tool, you will be equipped to make 16mm and 22mm brads. If you want to make a 28mm brad, you must purchase the 28mm rubber head as well.
Not only does the i-top make brads but it also makes Snap Daddies that snap onto Rings or Bobby Pins, Twist Daddies that twist into Hair Clips, and even magnets!
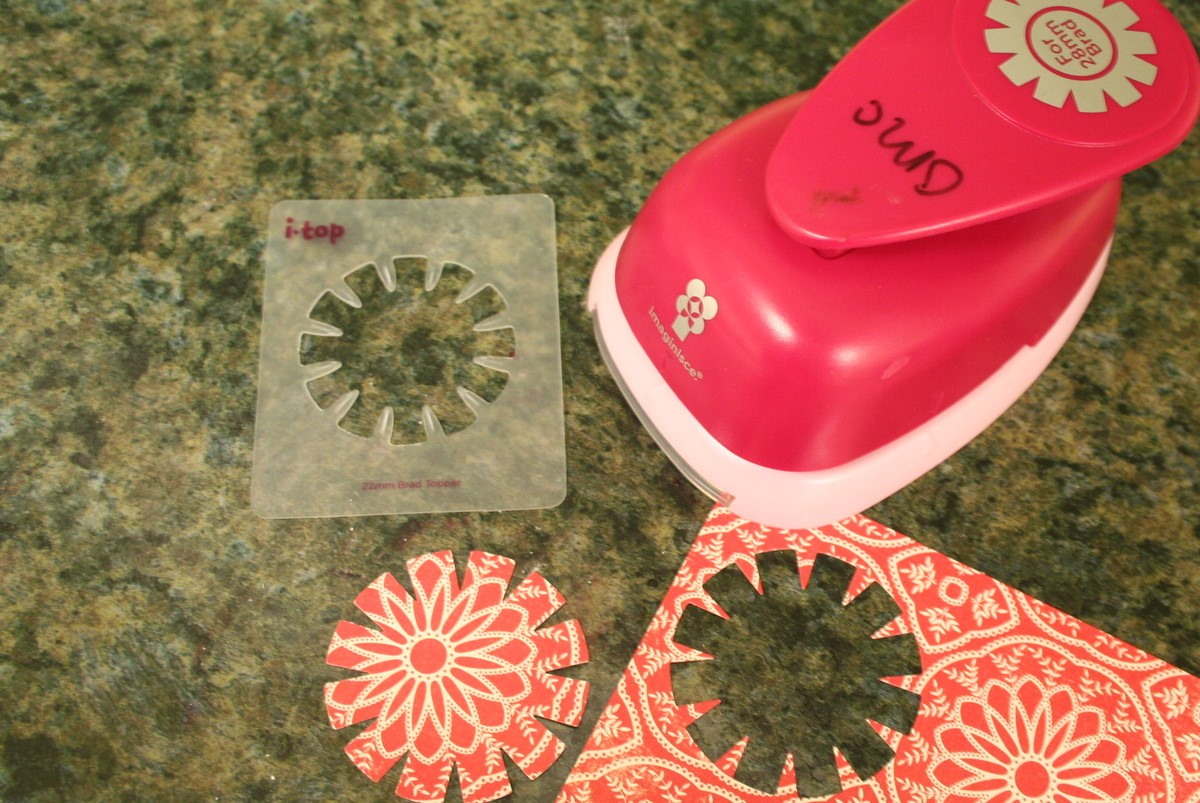
The I-top tool comes with stencils to trace and cut your own toppers, but if you buy the I-top Punch Kit, you can skip that step and save time.

If you make a brad with cardstock, spray a little water onto the paper with the Tim Holtz mini-mister to make it more pliable.
Instructions:
1. Make a topper
- With Paper: Insert paper into paper punch and punch to make the perfect topper, or use the stencil to trace and cut your own.
- With Fabric: Use stencil to cut out a circle.
2. Place the top piece of brad onto I-top tool.

3. Place the paper on brad.

4. Swivel the “neck” down so the rubber head will surround the brad, and then give a little squeeze.

5. Swivel neck up and push down the flaps of paper.

6. Place the bottom piece of brad onto I-top tool, swivel neck down and squeeze again.

7. Remove from rubber head to reveal your custom brad!

Happy crafting!


No comments:
Post a Comment