

Oh My Crafts' 12 Days of Christmas Day 5!
Holly Chocolate Box
Created by OMC Designer Lindsey

Supplies Used:
OMC Svg Cuts: Chocolate Box
Sizzix : Bigz Die - Holly Branch by Tim Holtz
Lifestyle Crafts : 6x12 Chipboard
Ranger Ink : Adirondack Spray - Meadow
Ranger Ink : Adirondack Alcohol Ink - Espresso, Pitch Black
Jolee's Boutique : Artisan Paper - Gold
American Crafts : ZING Embossing Powder - Brown
Tim Holtz : Embossing Ink Pad
Tim Holtz : Distress Stain - Walnut
Tim Holtz : Distress Tool
Sizzix : Vintage Ornament Die by Tim Holtz
Instructions:
Step 1
Cut 2 boxes from the OMC Svg cuts (Chocolate Box) Cut box out of vanilla cardstock. Cut the front portion off one of the box cuts. Set aside for later.

Step 2:
Cut a set of holly leaves from the Holly Die. Cut the leaves out of thin chipboard.

Using the Adirondack Meadow Spray, spray the chipboard leaves. Use a heat gun for fast drying. Do two coats of spray, making sure each coat is dry before doing the next coat.

Step 3:
Once the leaves are dry, use the distress tool from Tim Holtz and the walnut stain to add edge color to the leaves. This will hide any of the white chipboard.

Step 4:
Take the Perfect Pearls mist in Heirloom gold and spray on a wipe-able, stain free surface.

Spray a large circumference. Take cut out of box, turn to the outside, face down onto the spray. Rub the box threw mist, cover the entire box. Take paper towel to dab off extra.

Take the front box piece that you set aside earlier, and using the damask embossing folder, emboss, then repeat the inking process that was used on the rest of the box.
Step 5:
Take the chipboard branch and use the distress tool and the Espresso and pitch black alcohol inks to dab the ink over the branch piece until the desired color is reached.


Step 6:
Cut out an ornament die using the Tim Holtz die. Take the gold artisan paper and back the cut out ornament shape.
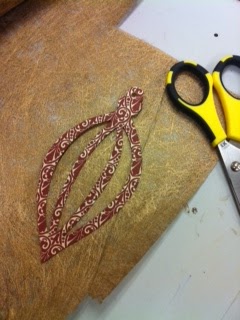
Step 7:
Take the Christmas stamp, and using the embossing ink, powder, and heat gun, stamp the saying, then heat emboss. Cut out the saying.


Step 8:
Layer all the cut out pieces on the front of the box, not gluing to the lid of the box.
Happy crafting!


No comments:
Post a Comment