
By Fancy Pants Designs/Jodi Sanford
Supply List:
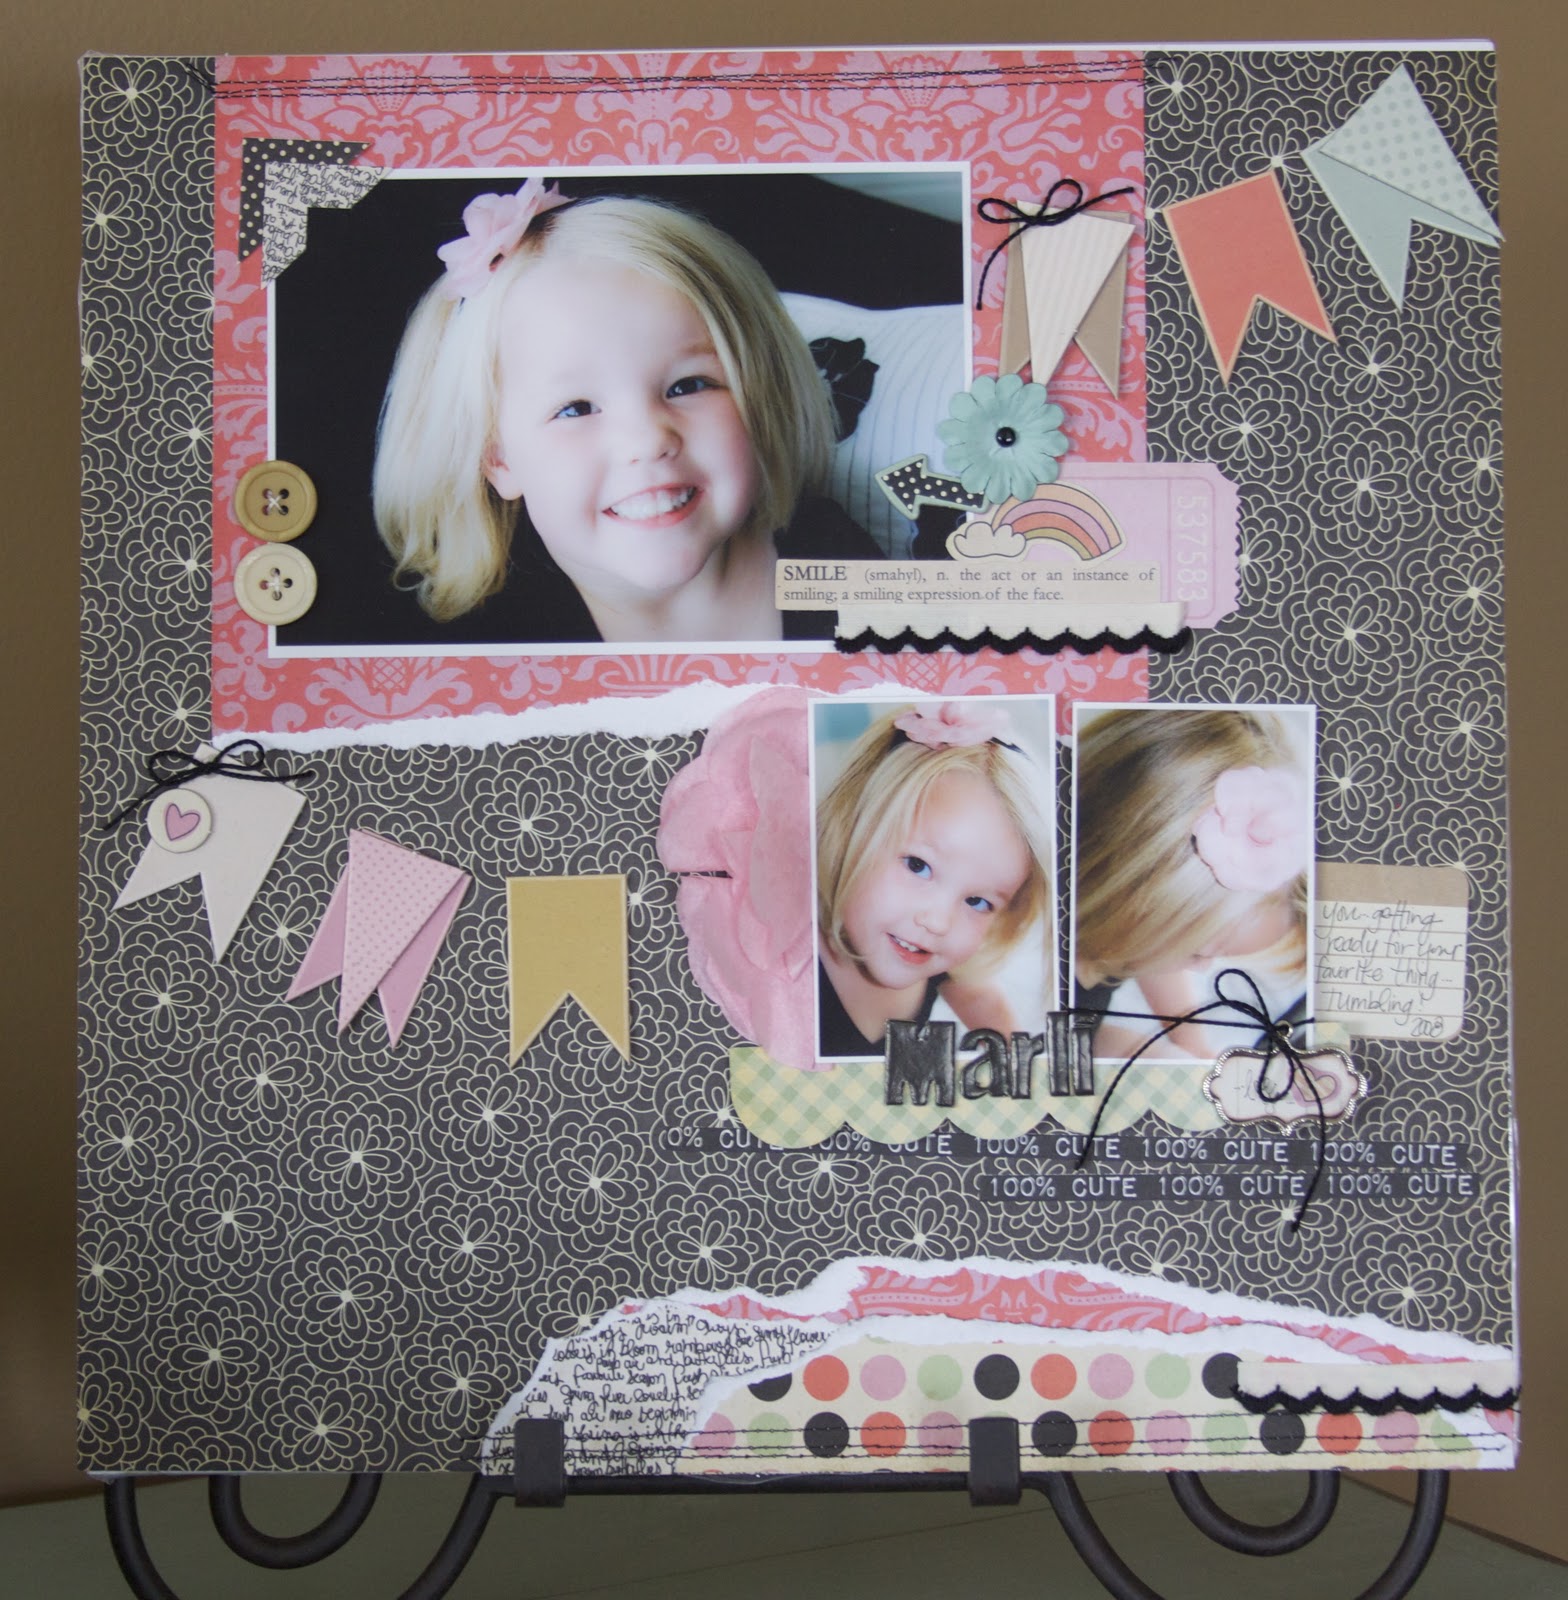
1 4x6 photo, 2 wallet sized photos
It’s the Little Things Papers (1 of each): Four Birds, Hummingbird, Cards, Strips, Pecking Order and Spring Fever
It’s the Little Things Banner Chipboards
It’s the Little Things Chipboard Pieces
It’s the Little Things Design Embellishments
It’s the Little Things Brads
It’s the Little Things Paper Flowers
It’s the Little Things Buttons
It’s the Little Things Element Stickers
Artist Edition Filter Embellishments (Floral Set)
Artist Edition Specialty Trim (Black)
Artist Edition Chipboard Alpha (Black)
Artist Edition Metal Charms (#1183)
Embroidery Floss (Black)
Journaling Pen (Black)
Instructions:
1. Place your Four Birds paper down for your base piece.
2. Trim a 8 (w) x 7 (t) piece from your Hummingbird paper. Tear the bottom edge.
3. Place at the top of the base piece, 1 inch from the left side and place photo on top. Adhere once you have it placed where you want it.
4. Add embellishments: Pink ticket, ‘smile’ definition, rainbow, arrow, flower and specialty trim all in the lower right corner of your photo, slightly overlapping one another for dimension.
5. Next, from your stickers, take the two photo corners and layer one on top of the other and place in upper left corner.
6. Add two buttons to the left, lower side of the photo. Stitch on if desired.
7. Take the three small floral filter embellishments and spray with Glimmer Mist (I used color Vintage Pink). Then, once dried, fold into quarters. (Fold in half, then in half again.) Adhere the final fold in the center.
8. Place wallet sized photos, side by side, where you want them according to the above matte—do not adhere until you’ve then placed the scalloped sticker (below instructions).
9. From your sticker sheet, trim out (with scissors to leave the adhesive cover on) the gingham scalloped border to 5 inches wide and place on page using foam squares for a dimension effect.
10. Now, place the filter embellishments tucked behind the left side photo and adhere to base page.
11. Adhere the wallet sized photos using foam squares, with the bottom portion placed on top of the scalloped border. (We will add embroidery floss through the back of the photo later.)
12. Add title (ours is Marli), from your Black Alpha Chipboard slightly over the bottom of your photos, on top of the scalloped border.
13. From your banner chipboard pieces, remove six ‘ribbon cut’ banners and three triangle banners from the sheets. Place three banners, in a half circle shape, to the right of your main photo matte. You will place a triangle banner shape on top of the first and last of these banners.
14. Place three banner pieces, in a half circle, to the left of your wallet size photos. You will place the triangle banner on top of the center one here.
15. Add circle, with heart in center, also from the chipboard banners sheets as an accent to the first banner on the far left side.
16. Choose your metal charm and use the template to cut out a base for it. (We used the cards paper (line side) as our base.) Add a small heart design embellishment to the right side, add text and adhere to charm.
17. Lace black embroidery floss under the right photo, then lace through metal charm and tie a bow. You may want to glue the metal charm in place.
18. From the cards paper, trim the gold lined piece out for journaling. Trim this to fit beside the photo on the right side. Add journaling.
19. Trim, from your strips paper, the 100% CUTE strip..cut in half and place beneath wallet sized photos/scallop border.
20. From your papers Pecking Order, Spring Fever and remaining Humminggbird papers, tear miscellaneous pieces to fit at the bottom of the page. This doesn’t have a specific size, or look, just play with it until you are happy!
21. Add 3 inch piece of specialty trim on these placed papers, flush with the right edge.
22. Last (if desired), stitch with a sewing machine along the top of your main photo matte and stitch along the bottom area of the layout, over the torn pieces! Beautiful page complete!

Happy crafting!


2 comments:
such a pretty layout....
So beautiful!!! TFS! :)
Post a Comment