Showing posts with label From the Craft Room-Katie. Show all posts

Boys, boys, boys!

Tuesday, February 23, 2010

In honor of our everything boy sale going on today, we want to showcase some fun LO's and projects featuring some of our favorite boy products!

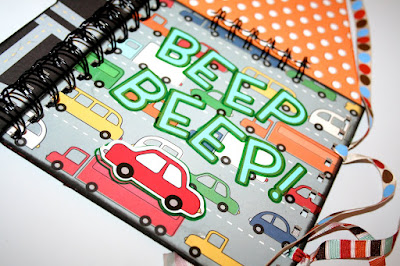
Here's one that our designer Katie made, featuring the fun and boyish pack Let's Roll, from Imaginisce: (And, check out this other project Katie made—also using the same paper pack...)


And if you think that's fun, check out this darling baby boy mini album using the Little Sprout paper collection from Fancy Pants. Little Sprout is perfect for baby—of either gender, but these pictures really show off what you can do for a boy.


Finally, sometimes paper that you wouldn't automatically think "boy" can be magically made boyish! Check out this LO, by Machelle, that features the "Ooh La La" collection by My Mind's Eye.


Ooh La La is right! So these are just a few of the awesome boy packs we've got available at OMC. Some new fav's? Graphic 45's "A Proper Gentleman." How great is that pack? And then remember when we showed you this layout featuring "The Boyfriend," by Cosmo Cricket?

And that's just paper. We've also got some awesome stud-muffin Cricut cartridges on sale. Dinosaur Tracks? Sports Mania? Superman, Batman? You betcha.

Happy crafting!

All aboard!

Friday, January 8, 2010


Who wouldn't love playing with this? It's a shame there's no supply of Powerwheels or Micro Machines somewhere around the OMC warehouse. Our designer Katie Rasmussen created this shortly before she gave birth to her little boy! And we're in love with it and new you all would be too.

Here's the products used to make such a neat little thing-a-ma-jig:
Imaginisce Let's Roll paper pack
12 chipboard squares
Bazzill Papers
Navel
• Kisses
Patch
Bon Bon
Pollen
• Maraschino
• Navy/OP
Tsukineko ink pad: Tuxedo
Memory Marker Brown, Green, Red
American Crafts Ribbon
Bind-It-All and Tool Kit
Black Wire Book Bindings
Scissors
• Marmalade
• Faded Jeans
• Tea Dye
Fiskars craft blade and cutting mat
Crop-a-dile

Here's how she created it:
1. Cut 4 of your chipboard squares into triangles for the roof pieces
2. Adhere your papers of choice to cover your walls, floors, and roof. Ink the edges with corresponding ink pads (ie. Marmalade for orange paper, Faded Jeans for blue, Tuxedo for everything else.)
3. With the Cricut Machine and Tags, Bags, Boxes & More cartridge, cut out with the blackout function on in two different sizes (Katie did 6 and 9 inches.) Trace this shape onto the center bottom of two of your wall pieces and cut the shape out. Cover doors with Bon Bon Bazzill Paper and ink with Tea Dye. You can use the brown Memory Marker to make a wood grain design on these doors as well.
4. Lay out your pieces in the correct order for them to be linked (as shown in the third picture down) and use the Bind-It-All to punch your binding holes.
5. Pick two chipboard trees from the Maya Road collection and cover with Patch and Bon Bon paper. Katie used Memory Markers to outline the shapes and make a plaid pattern on the green leafy pieces.
6. Cut out the words you want to display on the sides (like "Choo Choo" and "All Aboard") using the Cricut Machine and the Simply Sweet cartridge. Katie cut the words out with Patch, Atlantic, Kisses and Pollen Bazzill papers.
7. Embellish your sides with words and trees. TIP: Make sure you don't adhere any embellishments onto your pieces until after you've punched your binding holes.
8. Use your Bind-It-All to link the pieces together. Punch holes for your ribbon using the Crop-a-Dile. Secure ribbons through these holes. It's a good idea to de-fray the edges of your ribbon.

And wah-lah! Your kids (and you too) are ready to play!

Happy crafting!

Have Yourself a Merry Little Christmas

Tuesday, December 1, 2009

Have you had the chance to check out the Graphic 45 Christmas Past paper? It's gorgeous. And we love it. It really succeeds at achieving the particular look you may be searching for in a Christmas card or tag.

Take a gander at these winners done by Katie Rasmussen.


Don't you just adore these? Here's the supplies and instructions for the last tag with the snowflake on it.

Supplies:
Graphic 45 Christmas Past paper pack
Spellbinders Copper Premium Foil
Spellbinders Create a Flake #1
Embossing machine
Bazzill Black rick rack
Bazzill Cream tulle
Melissa Francis Mika Flakes
Making Memories vellum

Instructions:
• Cut a rectangle 3 1/4" x 2 1/4"; use the flat edge of the Corner Chomper on the corners.
• Cut another rectangle to 1 1/4" x 2 1/4."
• Adhere the second rectangle 3/4" from the bottom of the tag.
• Adhere black rick rack on the edges of the rectangle with Fabri-Tac
• Tie cream tulle around the tag above the rectangle, trim the edges into a zig zag pattern.
• Make snowflakes out of copper foil and cream vellum—one of each material—using the Create a Flake dies and your embossing machine. Adhere these two snowflakes onto the knot of the tulle bow. Put Zip Dry on the top snowflake and adhere mica flakes. When dry, place Bazzill jewels to the center of the snowflake.
• Using your Crop-a-Dile, punch a hole at the top of the tag and tie tulle and rick rack through it.

And you've got yourself a dainty little snowflake tag that will compliment any gift!

Happy crafting!

Hooray for baby boys!

Monday, November 2, 2009

Happy November everyone! Hopefully you're mostly recovered from all the Halloween festivities. And hopefully your kiddos will emerge from their sugar-induced craze sometime within the week. Hopefully.

Today we're happy to announce that one of our designers—Katie—just recently had a baby! But just before that, she whipped together this darling "mommy's journal" that we can't wait to show off to the world. This lovely project showcases many supplies that you can get from Oh My Crafts—including the darling Stomp paper pack from My Mind's Eye.


Here's the full list of supplies:
Bind-It-All O-Wires 1/2"
Stomp paper pack by My Mind's Eye
Bazzill Papers:
• Patch
• Brown
• Kevin
• Cashmere
Brown Memory Marker by American Crafts
• Caramel Apple
• Garden Fairy
• Pumpkin Pie
Maya Mist by Maya Road: Avocado
Bazzill Rick Rack: Brown
Distressed Ink Pad: Brushed Corduroy
Slight Alterations stamps: Tim Holtz Collection
Stickles: Cinnamon
Buttons
Wallet sized pictures
Various quotes

• When making the book, make sure to leave space for your binding so you don't go through any journaling entries or pictures!
• And it's helpful to apply your buttons after you bind your book.
• When using your glimmer mists, lay your pages out flat to dry before binding.

Happy crafting!

Are you thinkin' pink?

Wednesday, October 14, 2009

********WIN A PINK SLICE!!********
Just send in a card or layout that you have made regarding breast cancer awareness for our judges to look over. Send your submissions to
lana @ ohmycrafts . com! You have 24 HOURS! GO!


Now, on to the post.


If you follow our Facebook fan page, or if you get the Oh My Crafts e-mails, then you already know that this month is Think Pink in honor of Breast Cancer Awareness month. And you may already know that one lucky winner received this Think Pink album made by Katie Rasmussen. Well—today we ALL can be winners because Katie was kind enough to share the instructions with us!


Supplies
Fruit Punch Stickles
Rose Bud ink pad—Tsukineko
Cutting Mat
Paper Trimmer

Instructions
• Choose your papers, the cut two 4" strips of each with your paper trimmer (except the paper for the first page; only cut one 4" strip, then cut in half so you have two 4"x6" pieces.)

• Adhere your papers to the front and back sides of your album using the glue glider and Zip Dry (for around the edges).


• First page: Trim the edges with the craft blade. Use the small hole punch of the Crop-a- dile to make the edge scallop. Repeat on back side.


• Third page: Follow instructions for the first page, but use the large hole punch of the Crop-a-dile for the scallop.


• Fifth Page: Follow instructions for the third page but you'll need to use the craft blade to carefully make the holes for the scallop bigger.

• Once all your papers are covered and the glue is dry, ink all the edges with the Rose Bud ink pad from Tsukineko. Then embellish your edges with Fruit Punch Stickles and let dry.

• Then you can start adding pictures, journaling cards, and cutouts from the Think Pink Slice design card!

Happy crafting!

Boy Howdy—it's cold in Utah!

Wednesday, September 30, 2009

Guess that means that Fall is officially here. And tomorrow is October first. Time to think Halloween! And have we got some fun cards to show you! These darling looks were created by our very own Katie Rasmussen. Well...check 'em out!


Supplies:
Bazzill Paper Jubilee
Bazzill Paper Desert Marigold
Bazzill Paper Black/OP
Stickles Purple
Stickles Lime Peel
Stickles Yellow
Stickles Diamond
Craft Blade
Paper Trimmer
Cricut Cartridge Lyrical Letters
Glue Pen
Opaque Pen

Step 1:
Cut all your papers

• Fraidy Cat (borders paper from paper kit): With your paper trimmer, cut a piece 5 1/2 inches wide, 12 inches long.
• Boo Buttons (black papge with buttons from paper kit): With your paper trimmer, cut one piece to 5 1/2" x 3". Then cut four small strips about 1/2" thick, 6 inches long.
• Bazzill Jubilee: Cut a piece 4 1/4" x 11".
• Bazzill Black/OP: Cut a piece 5 1/2" x 2 1/2".
• Monster Mash (orange with characters from paper kit): with scissors, cut out a ghost, a skeleton in the coffin, a moon, and an old tree. Cut out the details with your craft knife (between branches).
• Bazzill Desert Marigold: With your Cricut machine and Lyrical Letters Cartridge, cut out the words "Come rest your bones at our halloWEENY roast!" in 1 1/4 inch size, with the Jack Sprat function. Then cut three more exclamation points in 2 inch size (you'll only be using the periods for the ellipses at the end of "our"(ie. "our...").

Step 2
• Center and adhere the Jubilee paper to the Fraidy Cat paper with your Glue Glider.
• Center and adhere the Black/OP paper to the BACKSIDE of the Boo Buttons paper, so the green is visible, not the decorated side.
• Arrange your pieces on the Jubilee paper. Put the words "Come rest your bones at our..." at the top of the paper, then place the Black/OP and Boo Buttons piece with the words "halloWEENY roast!" on that piece. Next, place your old tree, skeleton in the coffin, moon and ghost. Then place your four small strips on the bottom (slanting, not in straight lines). Once you come up with an arrangement you like, adhere them in place. Adhere the "halloWEENY roast!" on the black paper first, then adhere the "Come rest your bones at our..." at the top of the page. Then adhere the Black/OP and Boo Buttons piece under those words. Next, write your "when" "where" "time" and other instructions on your four strips with an opaque pen (Katie used the Olive Acrylic Pain Pen from Marvy) and adhere your strips to the bottom of the page, cut off the ends that stick off the page. Last, adhere your old tree, skeleton in the coffin, ghost, and moon to the page.

Step 3:
• With your black Memory Marker (medium end) go around the edge of the Jubilee paper and the edge of the Fraidy Cat. Then outline around the sides of the Black/OP and Boo Buttons paper and the "when, where and time" slats. With the fine tip, outline the ghost old tree, and skeleton in the coffin.
• With the Yellow Stickles, go over all the words.
• With the Lime Green Stickles, make a scallop design around the Black/OP and Boo Buttons piece.
• With the Diamond Stickles, go over the ghost and skeleton in the coffin.
• With the Purple Stickles, fill in the spaces between the "when, where and time" slats.
• Wait for the stickles to dry before handling.


And did you see this tutorial for the darling "Bubble Bubble Toil and Trouble" card that Katie also made? Check it out here.


Happy Halloween—in a month. And happy crafting!

Go Glitzy

Tuesday, September 22, 2009


Now here's a fun one for ya. Katie used the Glitz Olivia kit to make this a-maze-ing layout. And right now we're running a daily deal for the kit.


Supplies
8x8 vellum paper pack from Making Memories
Embossing machine
Craft Blade
Scissors
Pencil
Black Memory Marker from American Crafts
Cinnamon, Black Diamond, Orange, Xmas Red, Diamond

Page 1
Step 1: Cut Papers
•Orange Textile paper—Cut four strips 1 1/4" x 12". Run through embossing machine with Textile Texture embossing folder; you'll have to run each strip through 3 times to get the full length of the strip.

Roses paper—Cut most of hte paper individual roses; crumple up the roses.

Hearts paper—Cut one column of hearts off the side of the page; cut that strip into individual hearts.

Aqua blue vellum—Cut a piece to 8" x 5". Cut little circles, approx. 1" in diameter and crumple up.

Step 2: Assemble
Take your photo and the aqua blue vellum cut to 8" x 5" and arrange together so the picture is on the very left hand side of the strip and adhere.

Take your Music paper (this is your background paper) and place a strip of embossed paper on the top and on the bottom. In this particular case, the top strip was placed in the middle of the staff of music and the bottom one going right over the large rose in the bottom right hand corner. When they are placed where you want them, trace where they are (top and bottom of the strip) lightly with a pencil. Between these lines, use your craft blade to cut around elements of the paper (swirls and roses). Only cut the sides that are within the lines of your strip. (see picture below)

Now take your paper strips and feed them in and out of your paper where you cut, so the elements you cut out will go over your paper strip. When they're in place, glue them down where you can. (see picture below)


Do the same (tracing and cutting) with your photo piece. (see above picture) When you adhere your photo in place, only put adhesive behind the picture, if you put it outside the picture you'll be able to see the adhesive through the vellum. To adhere the right side of the vellum, only put one piece of the Glue Glider Permatac on each corner—it's small enough that you can't see it. Use a black Memory Marker to outline the photo and vellum.

Take the roses and blue circles you cut and crumpled and the hearts you cut out and arrange them on the bottom left hand corner and the top right hand corner of your page, then adhere them.

Using your Stickles, embellish the roses and swirls. Use Black Diamond on the black swirls, Cinnamon on the brown swirls, Orange and Xmas Red on the roses, and Diamond on the hearts. After the Stickles dries on the big roses that should be over your paper strip in the bottom right hand corner, put Glossy Accents over it and let dry.

Page 2
Adhere your photo to the lower right hand side of an 8" x 8" aqua blue vellum page.

You will be using the rainbow stripes paper and hearts paper as the back ground of this page.

Take the other two embossed strips and line them up with the two strips from your last page, trace around the strip lightly. On the top strip, cut around the last heart on the right side of the paper, wind the paper under this heart. Don't adhere yet. (see picture below)


Take your hearts paper (the one you cut one column of hearts off for the last page) and arrange your photo vellum piece on it, decide where you want to place your vellum and trace lightly with your pencil. Cut around one column on hearts just inside the traced lines so it will go over your vellum. Adhere your vellum piece to the hearts paper (only behind the photo and hearts and then one small piece of Permatac on each corner. Use your black Memory Marker to outline your photo, vellum page, and hearts on the vellum.

Adhere your hearts paper onto the center of your rainbow stripes paper. Adhere your embossed paper strips down.

Using the rest of your roses and circles you cut and crumpled, arrange them coming from the top left hand corner down to wrap around the top right hand side of your photo (like it's coming from the first page top corner to the photo).

Embellish your roses and hearts to match the first page.

And....break.

LinkWithin

Related Posts with Thumbnails