Fall Scrapbook Layout
Created by OMC Designer Lindsey
Supplies Used:
Fall themed Scrapbook Paper
Corrugated/Fluted Cardboard Paper
Kraft Paper
Tim Holtz Distress Ink: Rusty Hinge
Colored Misting Spray : Orange Hues
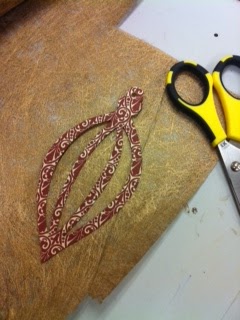
Leaf Shaped Punch or SVG Cut
Deep Edge Punch or Edge Die
Brads
Instructions:
1. Ink the edges of the paper with Tim Holtz Distress Ink.
2. Use scrap paper to punch or cut out the leaves to use for misting to create the leaf silhouette shapes on the page.
3. Once the leaves are cut out, lay them out on the page where you want the image to be. Take the mist and spray over the leaves. Leave in place for 2 min. This will allow dry time, after the two min, take the leaves off, this will give the image outline on the page.
4. Using the large leaf punch, punch 4 leaves in contrasting/coordinating paper.
5. Cut 3 squares one in brown corrugated cardboard, one in kraft corrugated cardboard and the last one in Artisan paper. These will be what you mount your pictures on. Cut according to size of picture.
5. Tear strips of the artisan paper to layer on the corrugated cardboard.
6. Use the Deep Edge Punch or Edge Die to create a decorative strip, ink and attach with two brads.
Happy Crafting!
Showing posts with label From the Craft Room-Lindsey. Show all posts
Fall Scrapbook Layout
Monday, November 19, 2012
Labels:
fall,
family,
From the Craft Room-Lindsey,
Holiday Ideas,
Layouts,
thanksgiving
Bushels of Fun Card
Saturday, November 17, 2012
Bushels of Fun Card
Created by OMC Designer Lindsey
Supplies Used:
BoBunny : Apple Cider Paper
BoBunny : Apple Cider Accent Paper
Tim Holtz : Distress Ink Pad - Walnut Stain, Rusty Hinge
Leaf shape die or stamp
Buttons
Foam Squares
Floss / Twine
Instructions:
1. Cut out a piece of patterned cardstock for the base of the card. Use the "Bushels of Fun" accent piece of paper for the front of the card. Ink the edges and attach to the base.
2. Pick several printed sheets of paper and cut out leaf shapes. Ink the edges and adhere the leaves at the bottom of accent piece.
3. Wrap twine around the card. Where the two ends meet lace a button and tie a knot.
Happy crafting!
Created by OMC Designer Lindsey

Supplies Used:
BoBunny : Apple Cider Paper
BoBunny : Apple Cider Accent Paper
Tim Holtz : Distress Ink Pad - Walnut Stain, Rusty Hinge
Leaf shape die or stamp
Buttons
Foam Squares
Floss / Twine
Instructions:
1. Cut out a piece of patterned cardstock for the base of the card. Use the "Bushels of Fun" accent piece of paper for the front of the card. Ink the edges and attach to the base.
2. Pick several printed sheets of paper and cut out leaf shapes. Ink the edges and adhere the leaves at the bottom of accent piece.
3. Wrap twine around the card. Where the two ends meet lace a button and tie a knot.
Happy crafting!

Labels:
Cards,
fall,
From the Craft Room-Lindsey,
Holiday Ideas,
Project Ideas
Happy Thanksgiving Box
Friday, November 16, 2012
Happy Thanksgiving Box
Created by OMC Designer Lindsey
Supplies Used:
Sizzix : Bigz XL Die - Box w/ Ornate Window
Kraft Paper
Inkadinkado : Harvest Dinner Stamp
Canvas Corp : E-Flute 12"x12" Open Stock
Archival Ink : Brown
Distress Ink: Rusty Hinge
Instructions:
1. Cut out the box and ink all of the edges. Take a leaf stamp and stamp over the whole box. Put the box together.
2. Take the ornate shaped piece that was cut out of the box, ink the edges, and stamp "Happy Thanksgiving" on it.
3. Stamp a leaf shape, cut it out and adhere on top of the ornate shape piece.
4. Cut a strip of E-Flute and wrap it around box. Glue the ornate shape onto the wrap.
5. For the opening, cut a piece of acetate or some clear packaging into a square shape, and glue under the lid.
6. Fill with treats or a gift!
Happy crafting!
Created by OMC Designer Lindsey

Supplies Used:
Sizzix : Bigz XL Die - Box w/ Ornate Window
Kraft Paper
Inkadinkado : Harvest Dinner Stamp
Canvas Corp : E-Flute 12"x12" Open Stock
Archival Ink : Brown
Distress Ink: Rusty Hinge
Instructions:
1. Cut out the box and ink all of the edges. Take a leaf stamp and stamp over the whole box. Put the box together.
2. Take the ornate shaped piece that was cut out of the box, ink the edges, and stamp "Happy Thanksgiving" on it.
3. Stamp a leaf shape, cut it out and adhere on top of the ornate shape piece.
4. Cut a strip of E-Flute and wrap it around box. Glue the ornate shape onto the wrap.
5. For the opening, cut a piece of acetate or some clear packaging into a square shape, and glue under the lid.
6. Fill with treats or a gift!

Happy crafting!

12 Days of Christmas - Day 5 Holly Chocolate Box
Monday, November 12, 2012

Oh My Crafts' 12 Days of Christmas Day 5!
Holly Chocolate Box
Created by OMC Designer Lindsey
Supplies Used:
OMC Svg Cuts: Chocolate Box
Sizzix : Bigz Die - Holly Branch by Tim Holtz
Lifestyle Crafts : 6x12 Chipboard
Ranger Ink : Adirondack Spray - Meadow
Ranger Ink : Adirondack Alcohol Ink - Espresso, Pitch Black
Jolee's Boutique : Artisan Paper - Gold
American Crafts : ZING Embossing Powder - Brown
Tim Holtz : Embossing Ink Pad
Tim Holtz : Distress Stain - Walnut
Tim Holtz : Distress Tool
Sizzix : Vintage Ornament Die by Tim Holtz
Instructions:
Step 1
Cut 2 boxes from the OMC Svg cuts (Chocolate Box) Cut box out of vanilla cardstock. Cut the front portion off one of the box cuts. Set aside for later.
Step 2:
Cut a set of holly leaves from the Holly Die. Cut the leaves out of thin chipboard.
Using the Adirondack Meadow Spray, spray the chipboard leaves. Use a heat gun for fast drying. Do two coats of spray, making sure each coat is dry before doing the next coat.
Step 3:
Once the leaves are dry, use the distress tool from Tim Holtz and the walnut stain to add edge color to the leaves. This will hide any of the white chipboard.
Step 4:
Take the Perfect Pearls mist in Heirloom gold and spray on a wipe-able, stain free surface.
Spray a large circumference. Take cut out of box, turn to the outside, face down onto the spray. Rub the box threw mist, cover the entire box. Take paper towel to dab off extra.
Take the front box piece that you set aside earlier, and using the damask embossing folder, emboss, then repeat the inking process that was used on the rest of the box.
Step 5:
Take the chipboard branch and use the distress tool and the Espresso and pitch black alcohol inks to dab the ink over the branch piece until the desired color is reached.
Step 6:
Cut out an ornament die using the Tim Holtz die. Take the gold artisan paper and back the cut out ornament shape.
Step 7:
Take the Christmas stamp, and using the embossing ink, powder, and heat gun, stamp the saying, then heat emboss. Cut out the saying.
Step 8:
Layer all the cut out pieces on the front of the box, not gluing to the lid of the box.
Happy crafting!

Skeleton Shadow Box
Thursday, October 25, 2012
Skeleton Shadow Box
Created by OMC Designer Lindsey
Supplies Used:
Sizzix : Bigz Pro Die Box w/ Lid #2
Lifestyle Crafts : Skeleton Die
Bazzill Basics : White Cardstock
Twine / Floss
Tim Holtz Stamp : Apothecary
American Crafts : Pebbles - Candies Black
Martha Stewart : Carnival Paper Pad
Instructions:
1. Cut out the base of the box using paper from the Carnival Paper pad. Assemble and ink the edges.
2. Cut the skeleton shape out of white cardstock and assemble. Use twine or floss to hang the skeleton inside the shadow box.
3. Stamp the "Happy Halloween" phrase on orange cardstock, then cut out. Ink the edges. Attach to the bottom of the shadow box and add the black Candies.

Happy crafting!
Created by OMC Designer Lindsey

Supplies Used:
Sizzix : Bigz Pro Die Box w/ Lid #2
Lifestyle Crafts : Skeleton Die
Bazzill Basics : White Cardstock
Twine / Floss
Tim Holtz Stamp : Apothecary
American Crafts : Pebbles - Candies Black
Martha Stewart : Carnival Paper Pad
Instructions:
1. Cut out the base of the box using paper from the Carnival Paper pad. Assemble and ink the edges.
2. Cut the skeleton shape out of white cardstock and assemble. Use twine or floss to hang the skeleton inside the shadow box.
3. Stamp the "Happy Halloween" phrase on orange cardstock, then cut out. Ink the edges. Attach to the bottom of the shadow box and add the black Candies.

Happy crafting!

Tombstone Halloween Decor
Tuesday, October 23, 2012
Tombstone Halloween Decor
Created by OMC Designer Lindsey
Supplies Used:
Spellbinders : Nestabilities - Nested Tombstones
Bazzill Basics : Cardstock: nor' easter, black, smokey white and saltillo
Tim Holtz : Stamp Sets - Mini Halloween 3 Set, Apothecary and Mini Halloween Stamp Set
Tim Holtz : Distress Ink - Black Soot, Rusty Hinge
Tim Holtz : Distress Tool
K and Company : Brenda Walton Haunted Word Adhesive Chipboard
EKSuccess : EK Tools - Tarantula Spider Punch
Stickles Glitter Glue : Purple, Black, Green, Ice White
Martha Stewart : Glitter Bats and Moon Stickers
American Crafts : Zing! Embossing Powder - Black
Inkadinkado : Fall Trees Clear Stamp
Oh My Vinyl : Brushed Silver
Ranger Ink : Dylusions Ink Spray
Instructions:
1. Cut 10 tombstones out of grey cardstock. Ink the edges with the distress ink.
2. For Tombstone #1, spray the front of the tombstone on an angle with the ink spray. Take the spider web stamp, stamp in an embossing stamp pad, stamp onto the tombstone and cover with embossing powder. Take the tombstone stamp and the small skull stamp, emboss the skull stamp, and cut out. Adhere with a foam square. Cut 3 different sizes and colors in the poison bottles. Ink the edges and cover each bottle with Glossy Accents.
3. For Tombstone #2, mist the front of the tombstone lightly with the ink spray. Take the tree stamp and emboss in black embossing powder. Choose 4 differing sizes of the glitter bat stickers and attach to the tombstone using small foam squares. Take the moon sticker and cut it to fit the tombstone. Using the smallest tombstone in the spellbinders pack, cut a tombstone, write RIP and ink the edges.
4. For Tombstone #3, use the script stamp and stamp all over the tombstone. Mist it with the three ink spray colors. Stamp Happy Halloween onto a piece of orange cardstock, cut out around the phrase, and adhere to the top of the tombstone. Stamp the mirror and cut it out. Cover the center oval of the mirror with the OMC metallic vinyl. Stamp the silhouetted head of the man, cut out and glue to the vinyl.
5. For Tombstone #4, mount the chipboard Eek piece to the tombstone, but cut off the top portion with the cat. Create the pumpkin using a punch. Ink the edges and attach to the tombstone. Use the large arsenic label, adhere to a piece of cardstock and create a scroll. Ink the edges and attach to the tombstone. Stamp a cat from the stamp set and emboss with black embossing powder.
6. For Tombstone #5, spray with black ink spray. Stamp and emboss the spider web twice. For the spiders, punch out two shapes in black cardstock. Use glossy Mod Podge to cover the spiders and sprinkle purple and black glitter over them. The Mod Podge will curl the spiders, giving them a dimensional look.
Happy crafting!
Created by OMC Designer Lindsey

Supplies Used:
Spellbinders : Nestabilities - Nested Tombstones
Bazzill Basics : Cardstock: nor' easter, black, smokey white and saltillo
Tim Holtz : Stamp Sets - Mini Halloween 3 Set, Apothecary and Mini Halloween Stamp Set
Tim Holtz : Distress Ink - Black Soot, Rusty Hinge
Tim Holtz : Distress Tool
K and Company : Brenda Walton Haunted Word Adhesive Chipboard
EKSuccess : EK Tools - Tarantula Spider Punch
Stickles Glitter Glue : Purple, Black, Green, Ice White
Martha Stewart : Glitter Bats and Moon Stickers
American Crafts : Zing! Embossing Powder - Black
Inkadinkado : Fall Trees Clear Stamp
Oh My Vinyl : Brushed Silver
Ranger Ink : Dylusions Ink Spray
Instructions:
1. Cut 10 tombstones out of grey cardstock. Ink the edges with the distress ink.
2. For Tombstone #1, spray the front of the tombstone on an angle with the ink spray. Take the spider web stamp, stamp in an embossing stamp pad, stamp onto the tombstone and cover with embossing powder. Take the tombstone stamp and the small skull stamp, emboss the skull stamp, and cut out. Adhere with a foam square. Cut 3 different sizes and colors in the poison bottles. Ink the edges and cover each bottle with Glossy Accents.
3. For Tombstone #2, mist the front of the tombstone lightly with the ink spray. Take the tree stamp and emboss in black embossing powder. Choose 4 differing sizes of the glitter bat stickers and attach to the tombstone using small foam squares. Take the moon sticker and cut it to fit the tombstone. Using the smallest tombstone in the spellbinders pack, cut a tombstone, write RIP and ink the edges.
4. For Tombstone #3, use the script stamp and stamp all over the tombstone. Mist it with the three ink spray colors. Stamp Happy Halloween onto a piece of orange cardstock, cut out around the phrase, and adhere to the top of the tombstone. Stamp the mirror and cut it out. Cover the center oval of the mirror with the OMC metallic vinyl. Stamp the silhouetted head of the man, cut out and glue to the vinyl.
5. For Tombstone #4, mount the chipboard Eek piece to the tombstone, but cut off the top portion with the cat. Create the pumpkin using a punch. Ink the edges and attach to the tombstone. Use the large arsenic label, adhere to a piece of cardstock and create a scroll. Ink the edges and attach to the tombstone. Stamp a cat from the stamp set and emboss with black embossing powder.
6. For Tombstone #5, spray with black ink spray. Stamp and emboss the spider web twice. For the spiders, punch out two shapes in black cardstock. Use glossy Mod Podge to cover the spiders and sprinkle purple and black glitter over them. The Mod Podge will curl the spiders, giving them a dimensional look.

Happy crafting!

Fall Family Layout
Friday, October 5, 2012
Fall Family Layout
Created by OMC Designer Lindsey
Supplies Used:
Sizzix : Bigz XL Die : Ornate #3
Authentique Paper
Tim Holtz : Distress Ink Pad - Walnut
Lifestyle Crafts : Scallop Square Punches Die
EKSuccess : Round Binding Edge Edger Punch
EKSuccess : Open Scallop Edger Punch
Doodlebug : Chunky Brads
Doodlebug : Doodle Twine - Brown
Instructions:
1. Cut a shape out of patterned paper using the ornate die. Ink the edges with the distress ink pad. Glue the shape in the bottom right corner of your layout page.
2. Using the sticker phrase strips from the paper pack, mount some of the phrases onto coordinating paper. Glue along the left side of the page.
3. Cut a piece of cardstock with the LifeStyle Scallop Square Punches Die. Cut the sides off to make it into a pendant shape, but leave the top with a scalloped edge. Stamp the letters for "family" onto the pendant pieces. Using glue dots, adhere the pendant pieces to the twine. Using foam squares, attach the pendant banner to the page. Add brads to the either end of the banner and tie twine around the brad base.
4. Cut a strip of paper 3" x 10" paper and use the Round Binding Edge Edger Punch to punch the edges. Then cut another strip 2" x 10" and use the Open Scallop Edger Punch on the edges. Layer the two strips together and staple to the bottom of the page.
5. Cut out picture mounts and adhere the photographs onto the mounts. Ink the edges of all the pictures. Mount the pictures on top of the strips of punched paper.
6. Add any other coordinating embellishments and tags.

Happy crafting!
Created by OMC Designer Lindsey
Supplies Used:
Sizzix : Bigz XL Die : Ornate #3
Authentique Paper
Tim Holtz : Distress Ink Pad - Walnut
Lifestyle Crafts : Scallop Square Punches Die
EKSuccess : Round Binding Edge Edger Punch
EKSuccess : Open Scallop Edger Punch
Doodlebug : Chunky Brads
Doodlebug : Doodle Twine - Brown
Instructions:
1. Cut a shape out of patterned paper using the ornate die. Ink the edges with the distress ink pad. Glue the shape in the bottom right corner of your layout page.
2. Using the sticker phrase strips from the paper pack, mount some of the phrases onto coordinating paper. Glue along the left side of the page.
3. Cut a piece of cardstock with the LifeStyle Scallop Square Punches Die. Cut the sides off to make it into a pendant shape, but leave the top with a scalloped edge. Stamp the letters for "family" onto the pendant pieces. Using glue dots, adhere the pendant pieces to the twine. Using foam squares, attach the pendant banner to the page. Add brads to the either end of the banner and tie twine around the brad base.
4. Cut a strip of paper 3" x 10" paper and use the Round Binding Edge Edger Punch to punch the edges. Then cut another strip 2" x 10" and use the Open Scallop Edger Punch on the edges. Layer the two strips together and staple to the bottom of the page.
5. Cut out picture mounts and adhere the photographs onto the mounts. Ink the edges of all the pictures. Mount the pictures on top of the strips of punched paper.
6. Add any other coordinating embellishments and tags.
Happy crafting!

Labels:
fall,
family,
From the Craft Room-Lindsey,
Holiday Ideas,
Layouts,
Project Ideas
"If Friends Were Flowers" Card
Tuesday, October 2, 2012
"If Friends Were Flowers" Card
Created by OMC Designer Lindsey
Supplies used:
Lifestyle Crafts : It Kits - Label It
Lifestyle Crafts : Happy Birthday Embossing Folder
Sizzix : Framelits Die Set 6PK W/Stamp : Flowers, Daisies
Twine
Buttons
Stamping Ink
Instructions:
1. Cut the base of the card out of white cardstock. Cut out a piece of Kraft cardstock, smaller than the white, and emboss with the embossing folder. Glue in center of the card base.
2. Using brown ink, stamp the two flowers onto pink cardstock and cut them out. Adhere buttons to the centers of the flowers and attach to the kraft cardstock.
3. Cut a pendant shape out of white cardstock and run twine through the holes. Cut another pennant shape out of white cardstock and stamp the saying onto it. Cut another slightly bigger pennant shape out of pink cardstock, and mount the stamped saying on top. Then mount the saying onto the piece with the twine. Attach to the main card.
4. Run twine around the front of the card.
Happy crafting!
Created by OMC Designer Lindsey

Supplies used:
Lifestyle Crafts : It Kits - Label It
Lifestyle Crafts : Happy Birthday Embossing Folder
Sizzix : Framelits Die Set 6PK W/Stamp : Flowers, Daisies
Twine
Buttons
Stamping Ink
Instructions:
1. Cut the base of the card out of white cardstock. Cut out a piece of Kraft cardstock, smaller than the white, and emboss with the embossing folder. Glue in center of the card base.
2. Using brown ink, stamp the two flowers onto pink cardstock and cut them out. Adhere buttons to the centers of the flowers and attach to the kraft cardstock.
3. Cut a pendant shape out of white cardstock and run twine through the holes. Cut another pennant shape out of white cardstock and stamp the saying onto it. Cut another slightly bigger pennant shape out of pink cardstock, and mount the stamped saying on top. Then mount the saying onto the piece with the twine. Attach to the main card.

4. Run twine around the front of the card.
Happy crafting!

Fall Leaves Card
Monday, October 1, 2012
Fall Leaves Card
Created by OMC Designer Lindsey
Supplies Used:
Bazzill Basics : Cardstock - Brown, Kraft, Cream
Tim Holtz : Distress Ink Pad - Rusty Hinge, Brushed Courdory, Crushed Olive
Lifestyle Crafts : Weave
Lifestyle Crafts : Eyelet Envelope SetLifestyle Crafts : Flourish Borders
Inkadinkado : Fall Icons Cling Stamp
Instructions:
1. Cut the base of the card out of brown cardstock : 4 3/4" x 3 1/2".
2. Cut a piece of the cream cardstock 3 1/4" x 4 1/2". Ink the edges with the crushed olive ink. Adhere to the brown cardstock.
3. Using the rusty hinge ink, stamp 2 leaf stamps to the left on the cream cardstock.
4. Tear a piece of the herringbone patterned paper and ink the edges. Cut out a weave border, ink the edges, and adhere both piece near the bottom of the cream cardstock with the weave border on top.
5. Cut a flourish element out of cardstock and attach it to the left corner near the stamped leaves.
6. Stamp leave on kraft cardstock and cut out. Assemble a cluster of leaves on top of the flourish element.
7. Before you glue on the top leaf, glue some gold fragments in the middle of the leaves.
8. Cut out an eyelet envelope for the card. Attach a brad and some twine.
Happy crafting!
Created by OMC Designer Lindsey

Supplies Used:
Bazzill Basics : Cardstock - Brown, Kraft, Cream
Tim Holtz : Distress Ink Pad - Rusty Hinge, Brushed Courdory, Crushed Olive
Lifestyle Crafts : Weave
Lifestyle Crafts : Eyelet Envelope SetLifestyle Crafts : Flourish Borders
Inkadinkado : Fall Icons Cling Stamp

Instructions:
1. Cut the base of the card out of brown cardstock : 4 3/4" x 3 1/2".
2. Cut a piece of the cream cardstock 3 1/4" x 4 1/2". Ink the edges with the crushed olive ink. Adhere to the brown cardstock.
3. Using the rusty hinge ink, stamp 2 leaf stamps to the left on the cream cardstock.
4. Tear a piece of the herringbone patterned paper and ink the edges. Cut out a weave border, ink the edges, and adhere both piece near the bottom of the cream cardstock with the weave border on top.
5. Cut a flourish element out of cardstock and attach it to the left corner near the stamped leaves.
6. Stamp leave on kraft cardstock and cut out. Assemble a cluster of leaves on top of the flourish element.
7. Before you glue on the top leaf, glue some gold fragments in the middle of the leaves.
8. Cut out an eyelet envelope for the card. Attach a brad and some twine.
Happy crafting!

Labels:
Cards,
fall,
From the Craft Room-Lindsey,
Holiday Ideas,
Project Ideas
Halloween Countdown Blocks
Friday, September 28, 2012
Halloween Countdown Blocks
Created by OMC Designer Lindsey

Supplies Used:
Doodlebug : Haunted Manor Paper Pack
Archival Ink - Black
OMC Vinyl : Black, Daffodil
Making Memories : Slice Design Card - Spook Alley MS+
Adams and Co. : Wood Block Set
Adhesive
Instructions:
1. Cut 16 squares 2 1/2" x 2 1/2" out of different patterned papers. Ink the edges of the papers with ink. Adhere paper to the wood blocks with liquid adhesive.
2. Using the Design Card, cut the numbers 0-8 out of vinyl. You will need to cut out two 2's and two 1's. You can use the number 6 for the number 9.
3. Once all the vinyl numbers are cut, attach them to the centers of the blocks.
4. After all the number are in place and you have checked to make sure that all the dates are accounted for, cover the entire block with liquid adhesive, such as Mod Podge.
5. Cut a strip of paper for the base block. Ink the edges, and adhere to the block. Cut out the phrase, "Halloween" out of vinyl and attach to the center of the block. Cover the base block with liquid adhesive as well.
Happy crafting!
Created by OMC Designer Lindsey

Supplies Used:
Doodlebug : Haunted Manor Paper Pack
Archival Ink - Black
OMC Vinyl : Black, Daffodil
Making Memories : Slice Design Card - Spook Alley MS+
Adams and Co. : Wood Block Set
Adhesive
Instructions:
1. Cut 16 squares 2 1/2" x 2 1/2" out of different patterned papers. Ink the edges of the papers with ink. Adhere paper to the wood blocks with liquid adhesive.
2. Using the Design Card, cut the numbers 0-8 out of vinyl. You will need to cut out two 2's and two 1's. You can use the number 6 for the number 9.
3. Once all the vinyl numbers are cut, attach them to the centers of the blocks.
4. After all the number are in place and you have checked to make sure that all the dates are accounted for, cover the entire block with liquid adhesive, such as Mod Podge.
5. Cut a strip of paper for the base block. Ink the edges, and adhere to the block. Cut out the phrase, "Halloween" out of vinyl and attach to the center of the block. Cover the base block with liquid adhesive as well.

Happy crafting!

Small Halloween Party Bags
Tuesday, September 25, 2012
Created by OMC Designer Lindsey
Supplies Used:
Life Style Crafts: QuicKutz BAG
Martha Stewart Carnival Paper Pack
Doodle Bug Haunted Manor Paper
Martha Stewart Carnival Stamps
Tim Holtz Distress Ink: Black Soot
Tips:
1. For the EEEEEEK! Stamp, a way to make it longer it stamp it twice, and paste it together under another stamp, so you cant tell the stamp isnt really that long.
2. With the Lifestyle dies, you can cut out more that one at a time, making these great party favors, they can be cut out and made in minutes.
3. Use pre-done embellishments like the ticket from the Doodlebug paper pack.
4. Twine is great for small bags like this.
Happy crafting!
Spooky Banner
Tuesday, September 11, 2012
Spooky Banner
Created by OMC Designer Lindsey
Supplies Used:
Doodlebug : Haunted Manor Paper Doodlebug Glitter : Limeade, Tangerine and Purple
Doodlebug : Doodle Twine - Black/WhiteMartha Stewart : Acrylic Craft Paint - Green Curry, Mace and Purple Martin
EKSuccess : Small Corner Rounder
Adhesive
Crop-a-Dile Tool Mod Podge
EKSuccess : Vampire Bat Large Punch
Martha Stewart : Scoring Board
EK Success : Large Circle Punch
Grunge Board
Instructions:
1. Cut 2 strips of paper for each rosette, and score every 1/2 inch. Fan fold back and forth. Glue ends together.
2. Punch out a circle to attach to the backs of the rosettes. This will hold the shape. Cut out paper squares and round the edges to cover the centers of the rosettes in front.
3. Cut the word "SPOOKY" out of grunge board and paint using the Martha Stewart paints. Cover with a coat of Mod Podge when dry. Cover the wet Mod Podge with glitter.
4. Punch holes in the sides of the rosettes and tie the rosettes together using twine. Punch a hole near the top of the first and last rosette. Thread twine through, and use to hang the banner.
5. Punch out 6 bat shapes. Take 2 shapes, and place twine between them before gluing them together. Make a total of three bats to hand below the banner. Tie the bats onto the twine between the 1st and 2nd rosette, the 3rd and 4th, and then the 5th and 6th.
Happy crafting!

Halloween Pillow Box
Monday, September 10, 2012
Halloween Pillow Box
Created by OMC Designer Lindsey
Supplies Used:
Sizzix : Bigz Pro Die - Pillow BoxStampendous : Royal Purple Glitter Glass
Martha Stewart : Carnival Paper Pack
Martha Stewart : Carnival Cling Rubber Stamps
Doodlebug : Haunted Manor Paper, Twine
Doodlebug : Buttons Pack - Orange
Tim Holtz : Distress Ink Pad - Black Soot
LifeStyle Crafts : RosetteDeco Petite Wire : Apple, Black
Adhesive
Instructions:
1. Cut out the pillow box, put together using adhesive, and ink the edges. Rip 2 strips of the bat paper, leaving the white torn edges. Wrap the strips around the pillow box, then wrap twine around the strips.
2. Pick three different prints of paper, then create three rosettes, one larger than the other two. Ink the edges of all three rosettes. In the center of the smaller two, glue buttons down. On the largest, trace a line of glue along the edges, then sprinkle the glass glitter onto the glue and allow to dry completely. Stamp a bat stamp onto a piece of paper, cut out the shape. Trace the shape onto a piece of glitter paper, and cut out. Attach the two bat shapes together, then adhere to the center of the largest rosette. Glue the three rosettes in a cluster on top of the strips of bat paper and twine.
3. Cut 3 strips of the green wire, wrap around a pen, and glue the ends under one of the rosettes. Cut 3 longer strips of the black wire, wrap around something that has a wider width, then glue under the rosettes.
5. Cut the "Trick or Treat" statement out of the Doodlebug paper, and use it to create a tag. Adhere to the pillow box.
Happy crafting!
Created by OMC Designer Lindsey

Supplies Used:
Sizzix : Bigz Pro Die - Pillow BoxStampendous : Royal Purple Glitter Glass
Martha Stewart : Carnival Paper Pack
Martha Stewart : Carnival Cling Rubber Stamps
Doodlebug : Haunted Manor Paper, Twine
Doodlebug : Buttons Pack - Orange
Tim Holtz : Distress Ink Pad - Black Soot
LifeStyle Crafts : RosetteDeco Petite Wire : Apple, Black
Adhesive
Instructions:
1. Cut out the pillow box, put together using adhesive, and ink the edges. Rip 2 strips of the bat paper, leaving the white torn edges. Wrap the strips around the pillow box, then wrap twine around the strips.
2. Pick three different prints of paper, then create three rosettes, one larger than the other two. Ink the edges of all three rosettes. In the center of the smaller two, glue buttons down. On the largest, trace a line of glue along the edges, then sprinkle the glass glitter onto the glue and allow to dry completely. Stamp a bat stamp onto a piece of paper, cut out the shape. Trace the shape onto a piece of glitter paper, and cut out. Attach the two bat shapes together, then adhere to the center of the largest rosette. Glue the three rosettes in a cluster on top of the strips of bat paper and twine.
3. Cut 3 strips of the green wire, wrap around a pen, and glue the ends under one of the rosettes. Cut 3 longer strips of the black wire, wrap around something that has a wider width, then glue under the rosettes.
5. Cut the "Trick or Treat" statement out of the Doodlebug paper, and use it to create a tag. Adhere to the pillow box.

Happy crafting!

Subscribe to:
Posts (Atom)