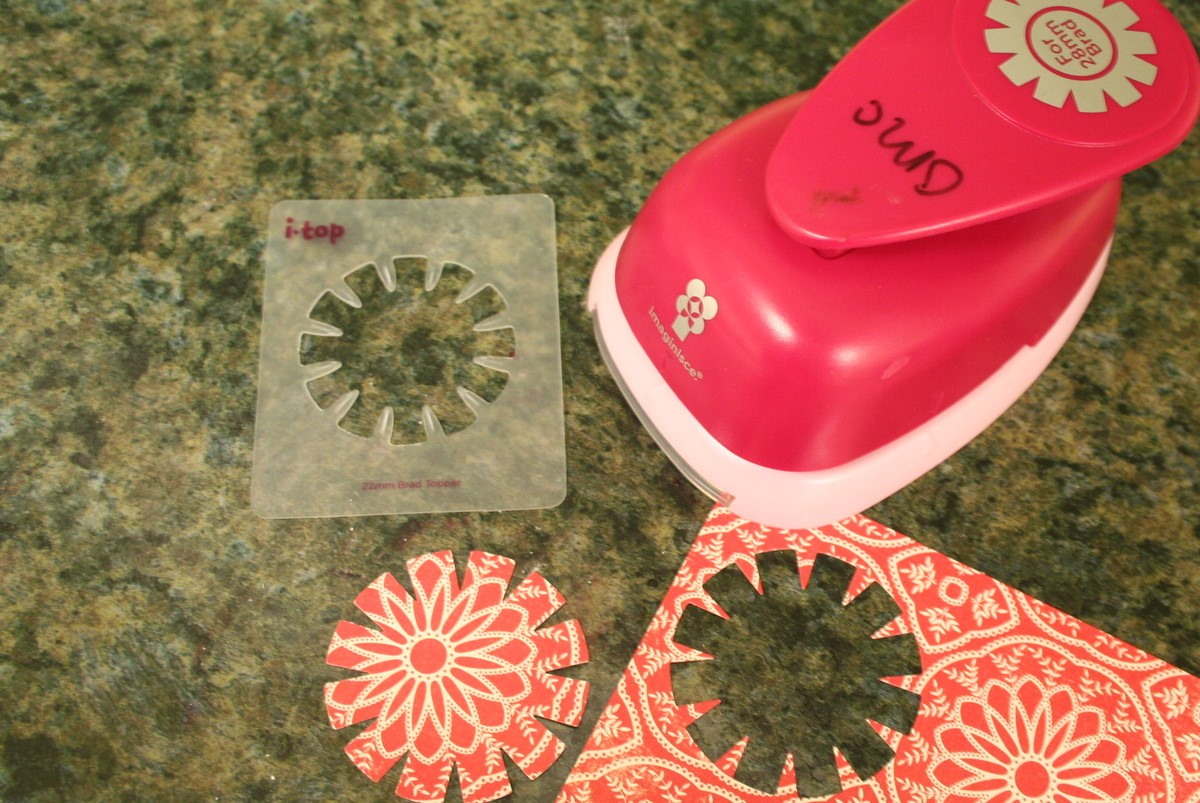
How to Make Your Own Brads Using the Imaginisce I-top Tool
Instructions provided by OMC designer Whitney
The I-top is such a fun and easy way to make your own brads!
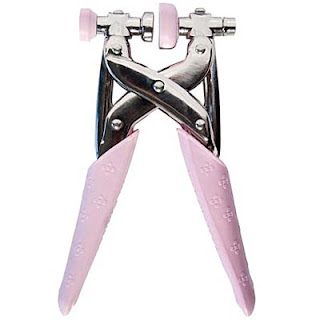
When you buy the tool, you should receive a CD demonstrating how to use the tool, but here is a little additional information you might enjoy:
There are 3 sizes of brads available: 16mm, 22mm, and 28mm
 When purchasing the tool, you will be equipped to make 16mm and 22mm brads. If you want to make a 28mm brad, you must purchase the 28mm rubber head as well.
Not only does the i-top make brads but it also makes Snap Daddies that snap onto Rings or Bobby Pins, Twist Daddies that twist into Hair Clips, and even magnets!
The I-top tool comes with stencils to trace and cut your own toppers, but if you buy the I-top Punch Kit, you can skip that step and save time.

If you make a brad with cardstock, spray a little water onto the paper with the Tim Holtz mini-mister to make it more pliable.
Instructions:
1. Make a topper
- With Paper: Insert paper into paper punch and punch to make the perfect topper, or use the stencil to trace and cut your own.
- With Fabric: Use stencil to cut out a circle.

2. Place the top piece of brad onto I-top tool.

3. Place the paper on brad.

4. Swivel the “neck” down so the rubber head will surround the brad, and then give a little squeeze.

5. Swivel neck up and push down the flaps of paper.

6. Place the bottom piece of brad onto I-top tool, swivel neck down and squeeze again.

7. Remove from rubber head to reveal your custom brad!

Happy crafting!

Canvas Board Halloween House by OMC Designer Machelle

Supplies Used:
12"x16" Canvas Board
Oh My Crafts : My Color Paint - Carrot, Black
Oh My Vinyl : Ebony, Transfer Tape
Cricut : October 31 Cartridge
Jolees Boutique : Glitter Spiders Dimensional Stickers
Bazzill Basics : Self Adhesive Jewels
Instructions:
1. Paint the canvas board using carrot paint. (I mixed a little black with the orange to and add a touch of black to the canvas.) Let it dry for several hours.
2. Use October 31st Cricut Cartridge cut the haunted house 9” from any vinyl you may have doesn’t matter the color. Weed out the center of the house leaving only the outline and removing small pieces to show all the details from the house. When finished apply transfer tape to the house. Remove backing from the house and then apply to the canvas board, Making sure to press firmly around all the edges of the house and all details. When finished remove the transfer tape from the vinyl leaving the outline of the house on the board.
3. Using the black paint, paint the inside area of the house. Make sure not to get paint in any area outside of the vinyl. Try not to brush too hard using more dabbing not brushing so you don’t get paint under the edges of the house. I used two coats of paint and then let it dry for several hours. After it is dry remove the vinyl and your haunted house will appear.
TIP: When applying the vinyl to the canvas I placed the canvas board on the table face down then used the squeegee and applied a lot of pressure to ensure that all the edges were firmly applied to the canvas board.

4. Cut Webs from October 31st cartridge small web 4” and large web 6 ½” follow the same process as you did for the house.
5. After completely dry add spiders and jewels as you desire.
Now it is ready to hang on your wall or use in any Halloween display. Enjoy!!!!
Happy crafting!
How To Use Sizzix Ink-Its Letterpress Plate by OMC Designer Whitney
The new Sizzix Ink-its Letterpress dies create artful ink-debossed impressions. And they’re so convenient and fun to use. If you’re a serious crafter—then you probably already have the embossing machine and ink pads.
Supplies Used:

Sizzix Ink-Its Letterpress Plate
Material to be inked (For best results use medium weight -100 lbs or more.) Regular cardstock, foil paper, felt, foam, and many other materials work too. Craft metal can also be debossed, but using shiny, non-porous materials with ink is not recommended because the ink will not dry. If using regular cardstock and not getting the impression you desire, place a thin piece of craft foam between the cutting pad and your paper.)
Shim: thin foam pad or felt. Do NOT use a silicone pad, it will ruin it.
Ink Pad
Big Shot, Vagabond, Cuttlebug, Epic 6
Instructions:
1. Ink letterpress plate with ink pad.
 2. Carefully place cardstock on top of letterpress plate and deboss using your Big Shot, BIGkick, Vagabond, or Cuttlebug machine:
Machine & Plates (listed from bottom to top)
Big Shot or BIGkick by Sizzix
MP platform open on tab 1 + Ink-its Letterpress plate + Paper + Shim* + Acrylic mat
Tim Holtz Vagabond
Platform (solo shim) + Ink-its Letterpress plate + Paper + Shim* + Acrylic Mat
Cuttlebug by Provo Craft
A plate + Ink-its Letterpress plate + Paper + Shim* + B plate
*Optional: Create a shim out of thin craft foam for a deeper impression.

3. Remove cardstock and set aside to dry.

4. Clean letterpress plate with water and a paper towel. For tougher cases, use a stamp cleaner.
Examples of projects done with Ink-its:
Formal Invitation
 Supplies Used:
Sizzix Ink-its Letterpress Plates (Rustic Trellis)
Letterpress Paper
Ink Pad (VersaColor: Black)
Prima Flower (Carlotta - Winery)
Instructions:
Step 1: Print invitation on cardstock and trim to size.
Step 2: Deboss cardstock with ink-its letterpress plate(instructions posted above)
Step 3: Mat invitation and letterpress strip to black cardstock.
Step 4: Apply additional embellishments such as Prima flowers.

Candle Embellishment
 Supplies Used:
Sizzix: Ink-its Letterpress Plate : ORNATE TRELLIS
Elizabeth Craft Design : Shimmer Sheetz - RED METALLIC
Supplies Used:
Sizzix: Ink-its Letterpress Plate : ORNATE TRELLIS
Elizabeth Craft Design : Shimmer Sheetz - RED METALLIC
Instructions:
Step 1: Trim shimmer sheets to fit around a candle.
Step 2: Deboss shimmer sheet with ink-its letterpress plate without ink. Since this is a shiny, non-porous material the ink will not dry. Also, use a shim since the sheet is quite thin.

Step 3: Wrap around candle.
Note: Remove before lighting candle.
Foam Flower Card

Supplies Used:
Sizzix Ink-its Letterpress Plate : BUTTERFLIES & FLOWERS
Bazzill Cardstock
Brown Craft Foam
Ribbon
Instructions:
Step 1: Deboss craft foam with ink-its letterpress plate, without ink, and without shim.
Step 2: Trim flowers from design and add gems to center of flower.
Step 3: Mat card with cardstock, adhere foam flowers, and tie bow around the card.
Autumn Box

Supplies Used:
Sizzix Ink-its Letterpress Plate : ELEGANT LOOPS
Bo Bunny : FOREVER FALL COLLECTION PACK
Tsukineko : VERSAFINE: Crimson Red
Sizzix Bigz Die : FLOWER, 3-D WRAPPED
Instructions:
Step 1: Cover box with patterned paper.
Step 2: Deboss paper with ink-its letterpress plate with maroon ink and a shim (instructions provided above).
Step 3: With the debossed paper, die cut sizzix flowers and assemble.
Step 4: Adhere 3 flowers to the box.

Happy crafting!