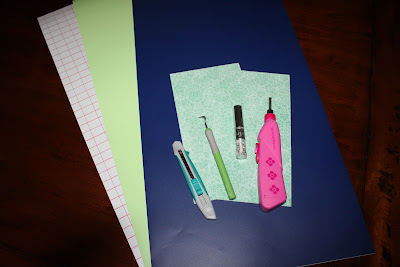
New Year’s resolutions – made any? Now’s the time to make some and we have a personalized notebook to help you get started. Whether it’s used for a journal or just a place to keep those creative ideas or thoughts, this notebook will reflect your personality! Simply choose 2 favorite colors of vinyl and grab one of those extra composition notebooks that are left over from school supply shopping, some scrap paper and in no time at all you’ll have your very own personalized notebook!

SUPPLY LIST:
Any kind of electronic die cutting machine: Cricut, Eclips, Silhouette, Slice etc.
For this project, we used Cricut cartridge: Wall Décor and More
Composition notebook: general office supply
Vinyl: Admiral blue and Key lime (we have over 40 colors) plus transfer tape
Patterned paper: My Minds Eye – 2 sheets
Embellishments: I rock tool and mirror glam rocks
Tools: pick, craft knife, scissors, squeegee to burnish with and corner rounder

Cutting chart for Cricut machines:
| Cartridge | Feature Key | Object | Cut Size In inches | Speed | Blade Depth | Pressure |
| Wall Décor and More | Monogram | “S” pg. 49 choose your own letter | 4 inches | medium | 4 | Low |
INSTRUCTIONS:
1. Turn base color of vinyl over. Open notebook and trace around edges. Remove notebook and trim approximately ¾” larger around tracing.
2. Carefully remove backing from vinyl and center notebook on vinyl. Lower one edge down and flatten. Repeat.
3. Turn over and smooth out any air bubbles. If there are several, carefully peel up vinyl from one corner and gently smooth back into place. If needed, a sharp needle can be used to prick air bubble so vinyl will lay smooth.
4. While book is closed, make 2 snips the width of the spine at top and bottom; trim out. Open back cover and use scissors to make 2 or 3 evenly spaced cuts to each corner (like a piece of pie). Next, fold in snips and then the long edges being careful to keep vinyl smooth. Repeat to front cover.
5. Follow the chart above to cut monogram of choice.
6. Weed and pick out centers. (See instructions included with vinyl.)
7. Apply transfer tape to monogram, burnish.
8. Transfer monogram, burnish.
9. Embellish with I rock and silver glam rocks.
10. Trim patterned paper to fit insides of cover. Leave about ¼ inch of base exposed. Round outer corners of paper to match corners if desired.
Happy crafting!


4 comments:
Very pretty, I've been covering my journals for a long time. I also use the compisition notebooks. Each one is different, giving me a variety. When I need a new one, I create a new cover design. I even made a version of Harry Potter's Maurauders Map.
Sandy, awesome project. I hadn't thought about using vinyl for the journals, but I can see how it would be extremely useful in protecting the cardboard. My mind is racing as I think about other ways to decorate all the journals I have sitting around screaming to be embellished.
Thanks so much for the instructions!
Hugs,
Carmen L
I'll post the projects I make on the facebook page since I don't have a blog.
cal8007 at aol dot com
Good idea. I got lost at number four?
April
I LOVE the way this turned out so now I must try it. Thanks for the inspiration and instructions.
Post a Comment