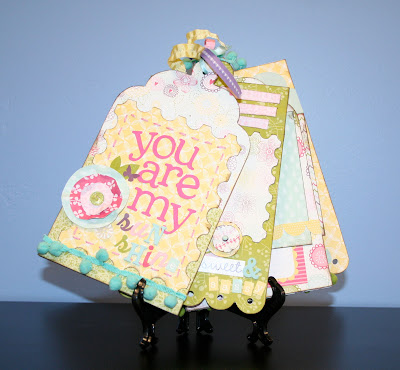
SUPPLY LIST:
Echo Park : Springtime Paper Pack
Sizzix : Big Shot Pro Die - Album, Tag
Cricut Cartridge: Sentimentals
Cricut Cartridge : Alphalicious
Cricut Cartridge: Accent Essentials
Cinch : Chipboard (2 packs)
We R Memory Keepers : Sew Easy Tool
Jenni Bowlin : Dye Ink Pad - Brown Sugar
Quickutz : Dots embossing folder
Prima : Pom Pom - Blue, Green
Prima : Lace Ribbon
American Crafts : Thickers
Fancy Pants : Posies Pink
i-rock Tool
Crop-a-dile Tool
Basic Grey : Buttons
Maya Road : Envelopes
Glossy Accents
INSTRUCTIONS:
1. Cut the Cinch chipboard in the Big Shot using the Sizzix Album die. You may need to use a blade to cut through all layers. Use the Crop-a-dile tool to punch out the holes. Choose which papers you want and where you would like to place them in the album. Plan where you would like to use your embellishments.
Page 1
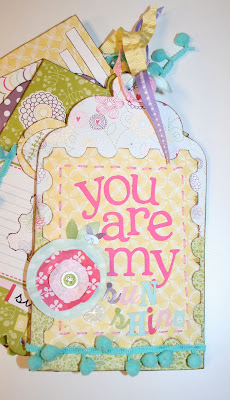
From the Springtime paper pack, take the sheet that has 6"x6" paper sections on the back. Cut the side with the blue floral and green print on the Album die (that way it will fit the album perfectly). Ink the edges with the Jenni Bowling Dye Ink Pad before gluing down. Choose another paper from the Springtime pack and cut out a stamp image using the Sentimentals cartridge (size 6 ½"). Ink around all edges. Using the Seweasy tool, stitch around the stamp paper with pink floss. Glue the stamp to the main album page.
Cut “You are my” with the Alphalicious Cartridge (size 1 ½"). For the word "sun shine", use a combination of the sticker letters from the paper pack and the Thickers letter stickers. Cut a 5 ½" piece of blue pom pom ribbon and glue it along the bottom of the page.
Cut three circles out of different paper prints in three different sizes. Crumble the circles, layer them on top of each other, and glue together. Glue a button in the center of the flower. Attach flower to the left side of the phrase.
Page 2
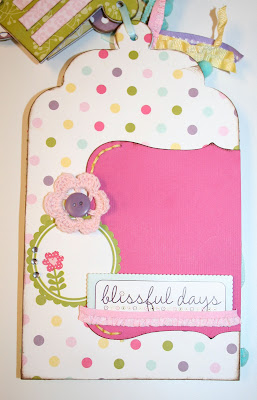
Cut the polka-dot paper using the Album die, ink the edges and glue down on the chipboard. Cut out a frame accent using the Accent Essentials Cartridge (size 4 ¾"), ink the edges and glue on the right side of the page about an inch from the bottom. Place circle sticker on the left side of frame accent. Attach 3 i-rock gems to the left side of the sticker. Glue the Fancy Pants Posie above the sticker and glue a button in the center. Take the “blissful days” sticker and put foam squares under it and attach the the bottom of the frame accent. Cut a piece of pink ruffle ribbon and attach it along the bottom of the "blissful days" sticker.
Page 3
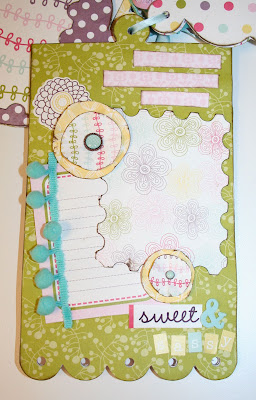
Cut a sheet of green print to fit the album, ink the edges, and glue it down. Cut out the journaling square with the light pink border and attach it to the bottom left side of the page. Cut out a stamp image (size 4), ink the edges, and layer it over the top right side of the journaling square. Cut a strip of pom pom ribbon and attach it to the left side of the journaling square. Cut two circles (one big, one small) out of the yellow print paper. Cut two circles of the striped vine paper and mount them in the centers of two yellow flowers. Attach a brad to the center of each flower. Cut out "sweet: from the "sweet spring" sticker, and attach it to the bottom right corner of the page along with the small sticker letters to spell out "sassy". Cut several stripes of pink paper for journaling and attach to the top right corner of the page.
Page 4
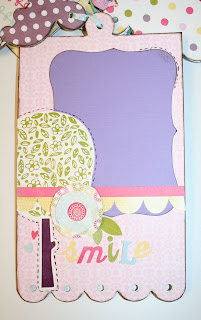
Cut a pink printed sheet with the Album die, ink and cover the album page. Cut a frame accent using the Accent Essentials Cartridge (size 3 ¾"), ink the edges and glue down on right side of the page. Attach the sticker tree on the left side of the page. Using a brown marker, make stitch marks around tree. Cut out two paper circles, one big and one little, and layer them to create a flower. Attach a sticker to the center of the flower and glue the whole piece down. Use sticker letters to spell “smile” on the right side of the tree trunk.
Page 5
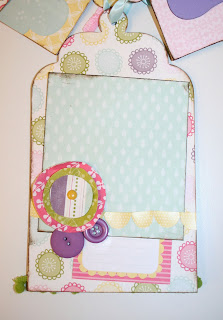
Cut the paper with scalloped circles with the Album die, ink and glue down on the album page. Cut a 4 ½" x 5" square of the blue tear drop paper, ink the edges, and glue down in the middle of the page at a slight angle.
Attach a yellow scallop border strip across the bottom of the blue tear drop square. Cut the hot pink journaling card in half and attach one side under the blue tear drop square.
Cut three circles in different prints (small, medium, large), and hold them together with a brad. Glue to the bottom left corner of the blue tear drop square in a cluster along with two purple buttons.
Page 6
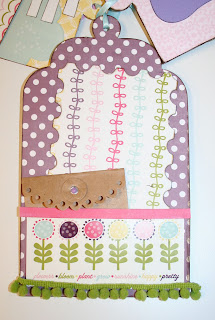
Cut the purple polka dot paper with the Album die, ink the edges, and attach to the album page. Cut out a stamp image using the Sentimentals cartridge (size 4 ½), ink the edges and glue down at an angle on the page.
Emboss the Maya Road envelop using the Dots embossing folder and glue at the bottom of stamp image. Attach the long flower sticker over the bottom of the envelope. At the top of the sticker glue a strip of bright pink paper. At the bottom of the sticker glue a piece of green pom-pom ribbon.
Page 7
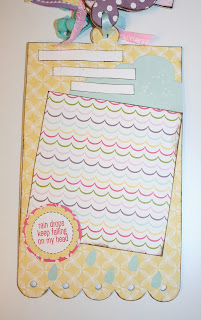
Cut the yellow printed paper with the Album die, ink the edges, and glue down on the album page. Attach the cloud sticker to the top right of the page. Cut and glue a 2 1/2" x 2 1/2" square down in the center of the page at an angle. Mount the “rain drops” sticker at the bottom left of the square. Cut three journaling strips and attach on the top of the page.
Page 8 (back)
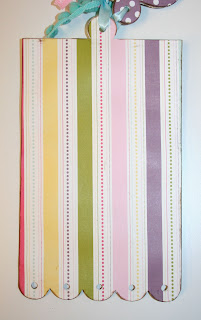
Cut out a print using the Album die and cover the album page.
If you have any other questions about this project, feel free to contact Lindsey at lindsfill@gmail.com with the project name in the subject line.
Happy crafting!


2 comments:
awesome tags! What do you use them for?
Awesome, I just love this. www.thefruitofmyhands.blogspot.com
Post a Comment