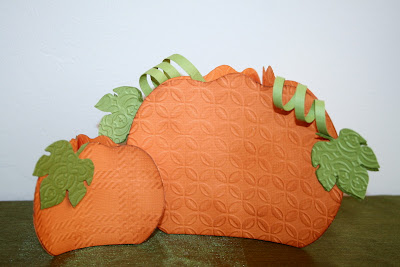
Sometimes it’s the simplest things that really make a difference. This pumpkin is such an easy piece to put together, but you’ll love the festive look it gives off in your home.
Supplies Used:
Lifestyle Crafts : Nesting Pumpkins
Bazzill Cardstock : Orange and Green
Oh My Crafts : Acid Free Craft Tape
Brown Ink Pad
Cuttlebug Embossing Folder or Sizzix Textured Impressions
Instructions:
Step 1: Die Cut

Die cut 3 large and 3 small pumpkins, 5 leaves, and 3 stems with die-cutting machine and Lifestyle Crafts’ Nesting Pumpkins die:
| Machine | Mats for Cutting |
| Cutting Platform + Cutting Mat | |
| Cutting Mats: A+B+C | |
| Multipurpose Platform + 2 Acrylic Mats | |
| Base Plate + Cutting Plate | |
| Multipurpose Platform + 2 Acrylic Mats |
Step 2: Emboss

Emboss the pumpkins and leaves with embossing folders and ink the edges with brown ink.
Step 3: Assemble

Adhere the three large pumpkins together and attach the stems and leaves. Repeat for the small pumpkin.

Happy crafting!


2 comments:
Oh these are adoreable and I have to make them TODAY! Thanks for doing all the work, and now I just get to be a copycat!
OMG these pumpkins are adoreable and have to make them TODAY! Thank you for doing all the work, now I just get to be a copycat!
Post a Comment